The Supermicro C7Z370-CG-IW Motherboard Review: SM's First Mini-ITX Gaming Board
by Joe Shields on April 30, 2018 12:01 PM EST- Posted in
- Motherboards
- Intel
- Mini ITX
- Supermicro
- Coffee Lake
- Z370
- i7-8700K
- C7Z370
BIOS
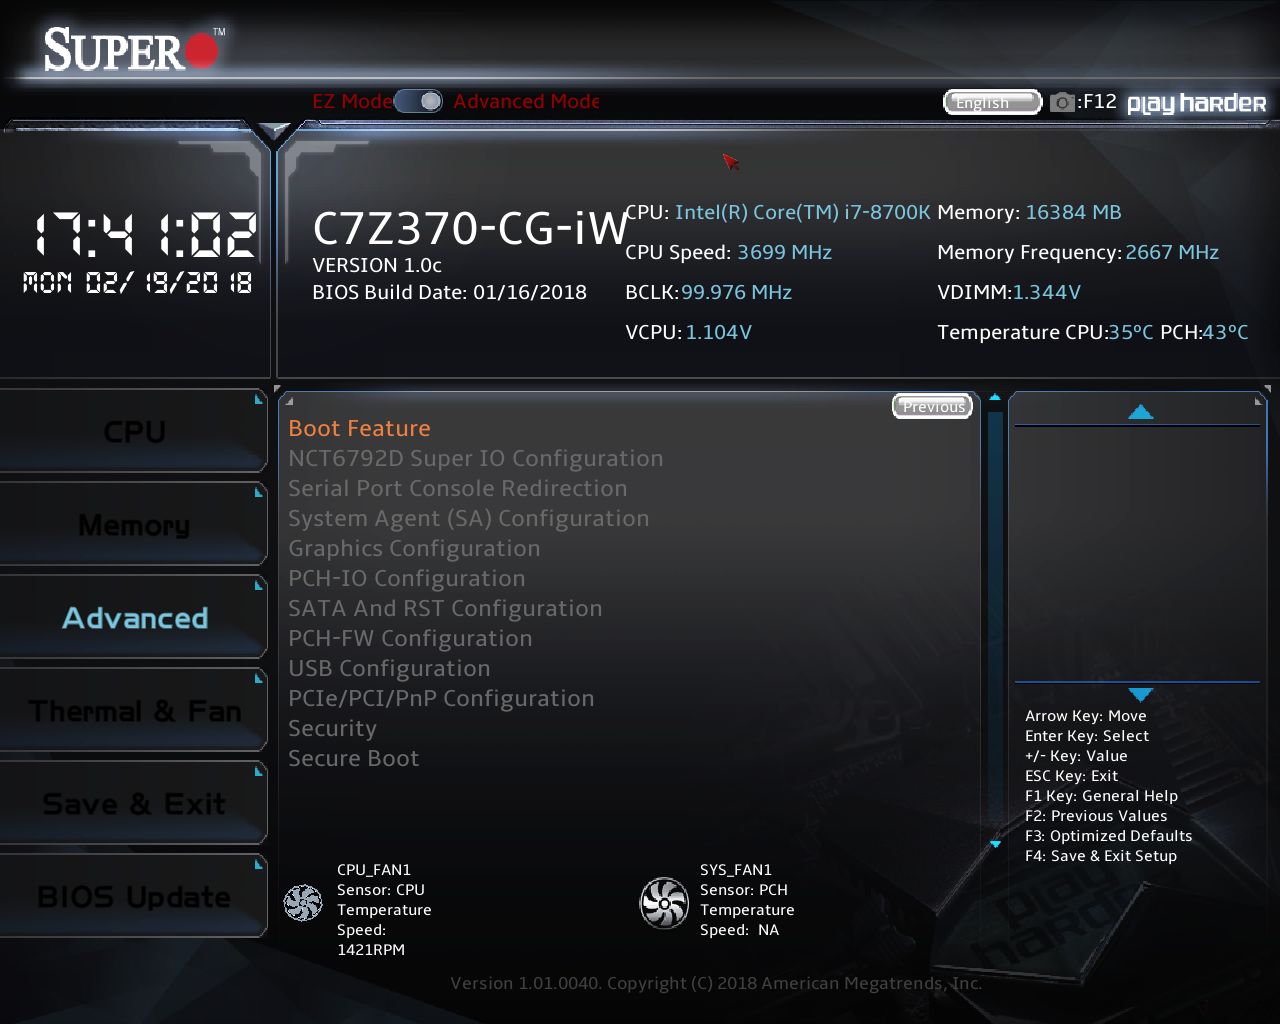
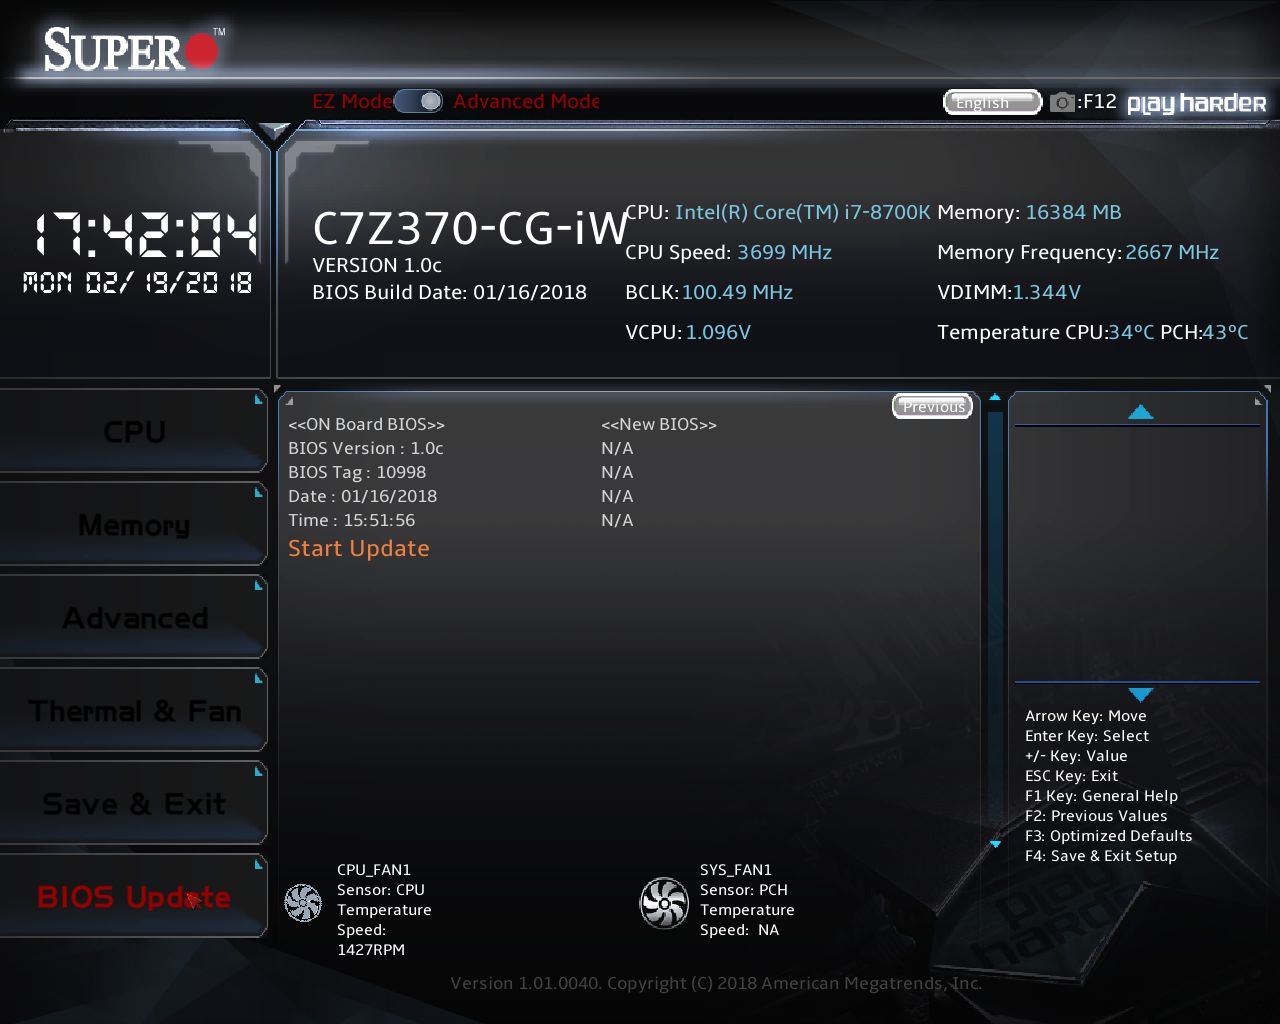
The SuperO BIOS starts off with an EZ Mode which displays pertinent information about the current system state. Across the top gives date/time as well motherboard and BIOS version as well as information about the CPU (clock speed, BCLK, VCore) and Memory (capacity, frequency, voltage), and includes temperature readings for the CPU and chipset.

Users are able to change the boot order and HDD list on the right side. As a side note about booting - the board arrives by default setup for legacy BIOS and I was unable to get the drive within the boot order until it was switched to UEFI. Outside of that, we are also able to load CPU profiles, enable/disable XMP profiles, as well as enable/disable Fast Boot from the EZ Mode Screen. One thing that does look out of place however is the text clipping between the motherboard name and some of the information.
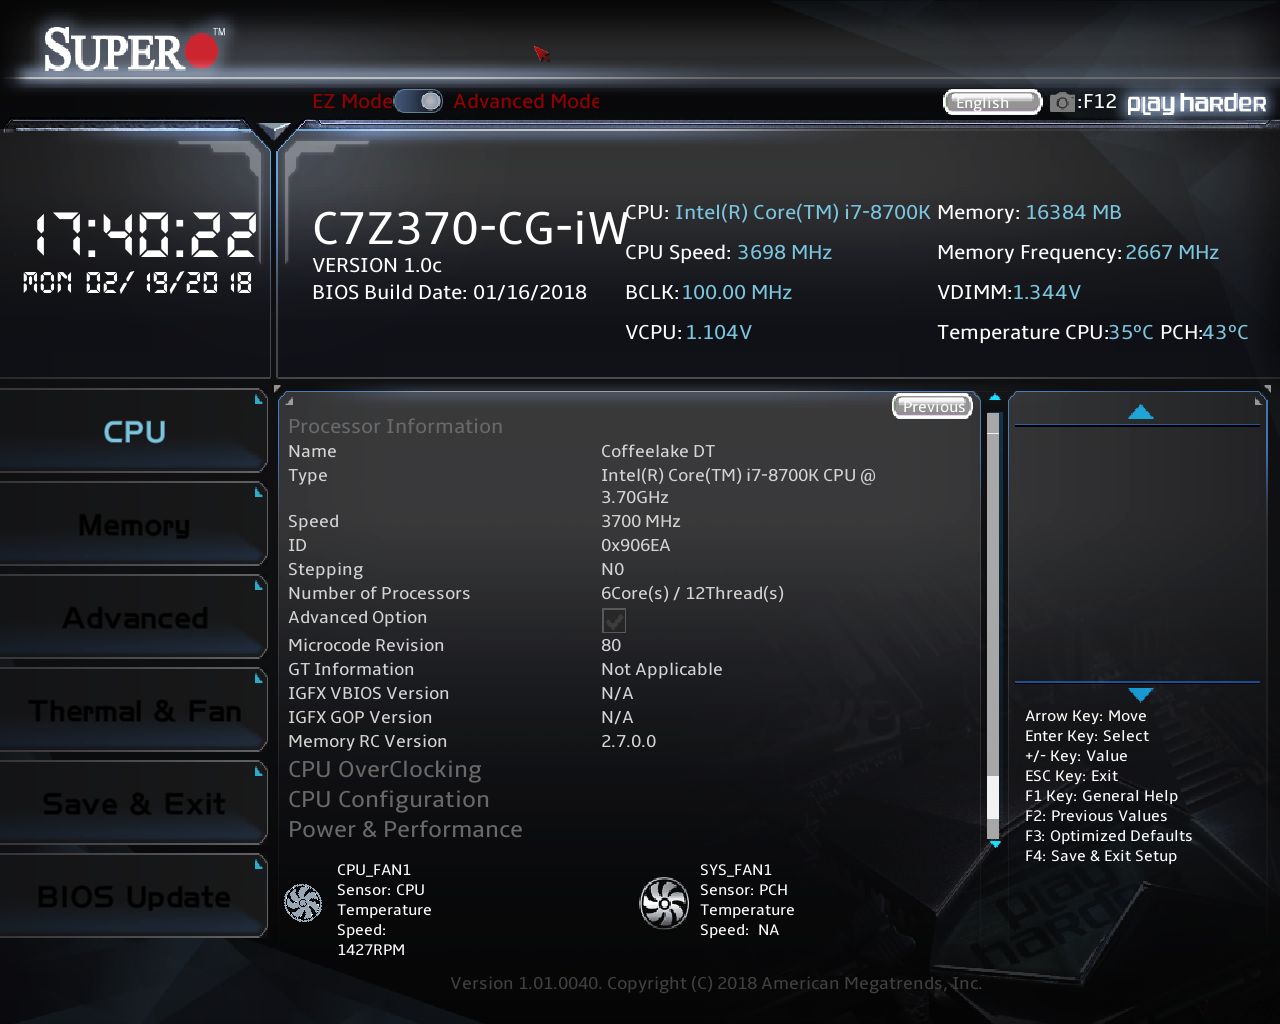
Once in the Advanced Mode, the bottom 2/3 of the screen changes with a menu on the left side and display areas to the right. There are a total of six sections - CPU, Memory, Advanced, Thermal & Fan, Save & Exit, and BIOS Update. The BIOS is a new design from SuperO compared to past offerings. While most items are located in logical places, if you have never used a consumer level SuperO board, it may take a bit of getting used to.
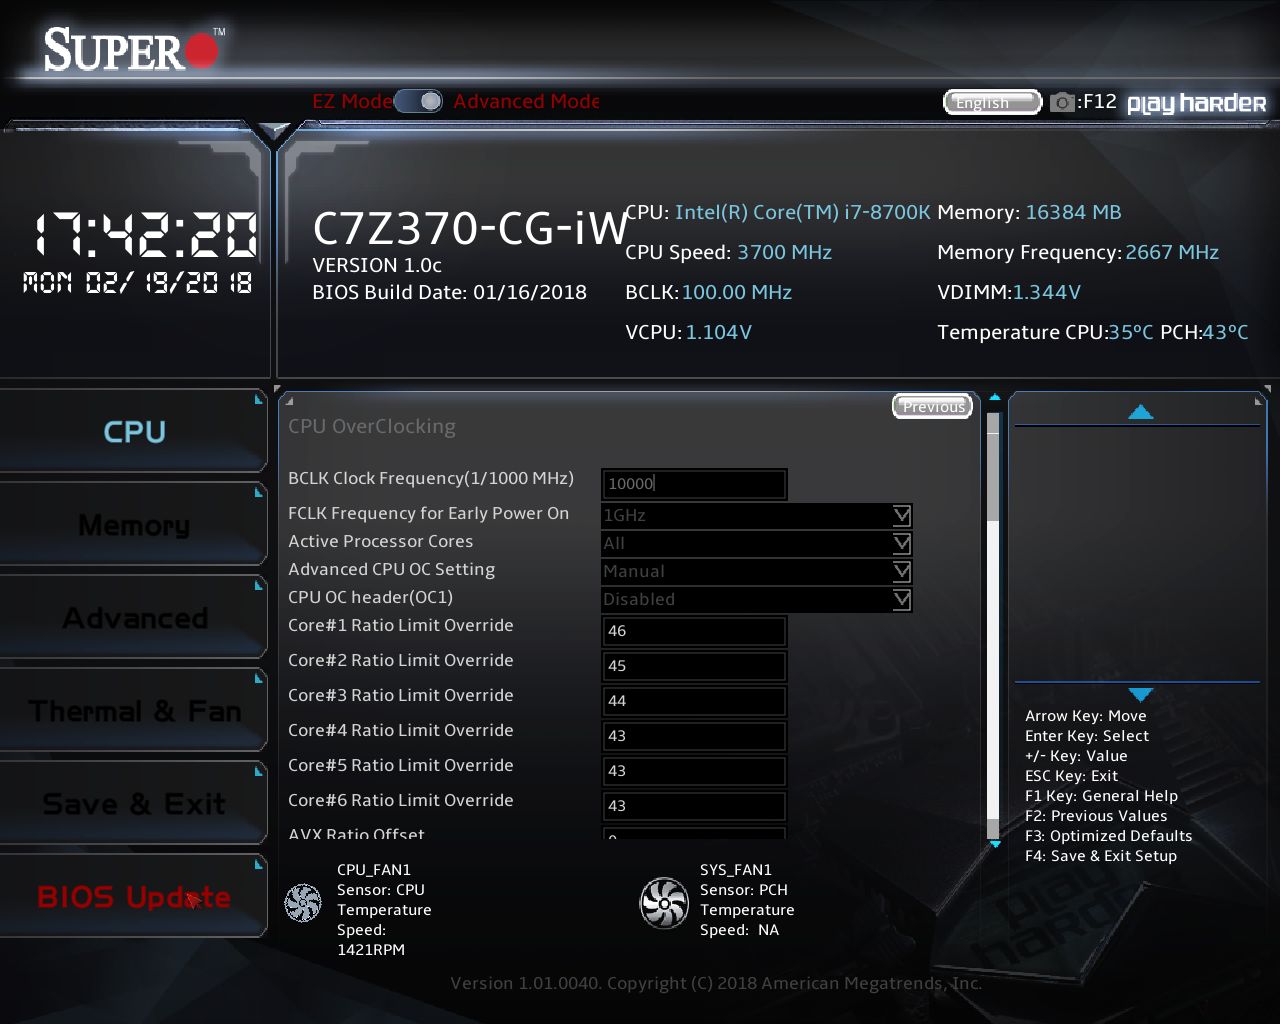
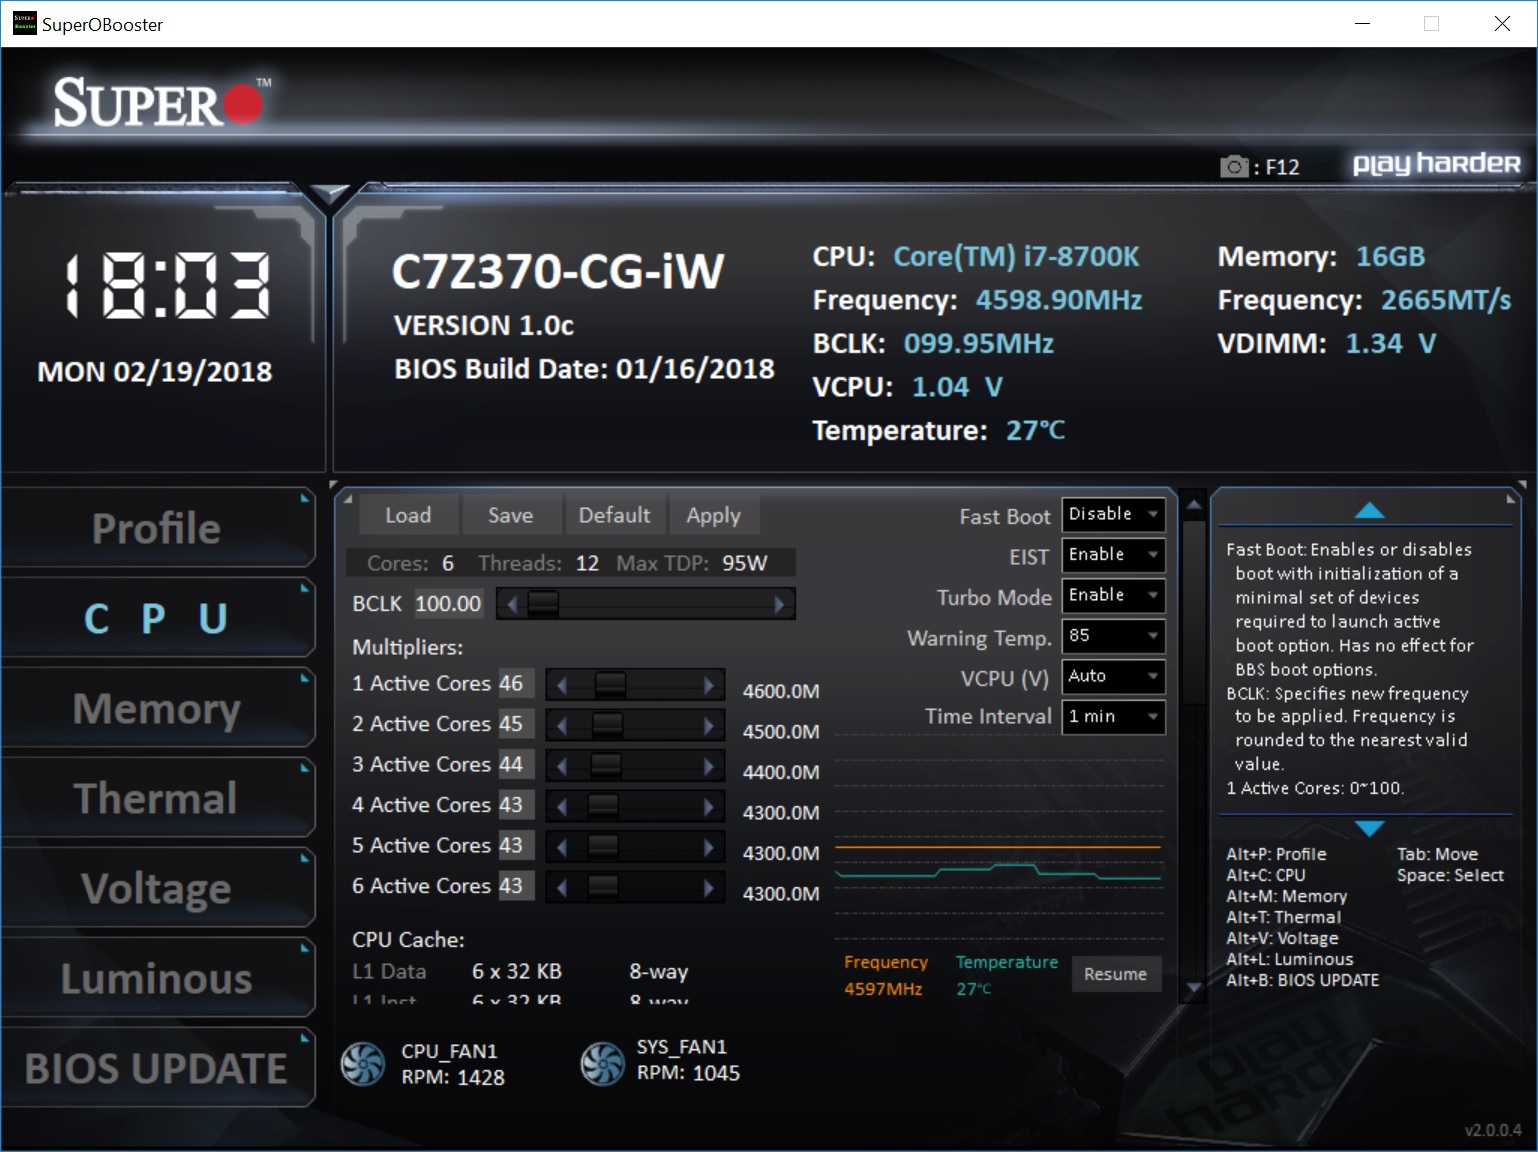
The CPU section is information on the first page with three options to dig down. The CPU Overclocking section (two smaller images below) contains most of the options needed for overclocking including CPU Ratio, BCLK, Voltages, and power limits among other items (no current limit settings, more on this in the overclocking section). The CPU configuration section is where we can enable/disable CPU specific features such as Hyperthreading or VT-d for example.

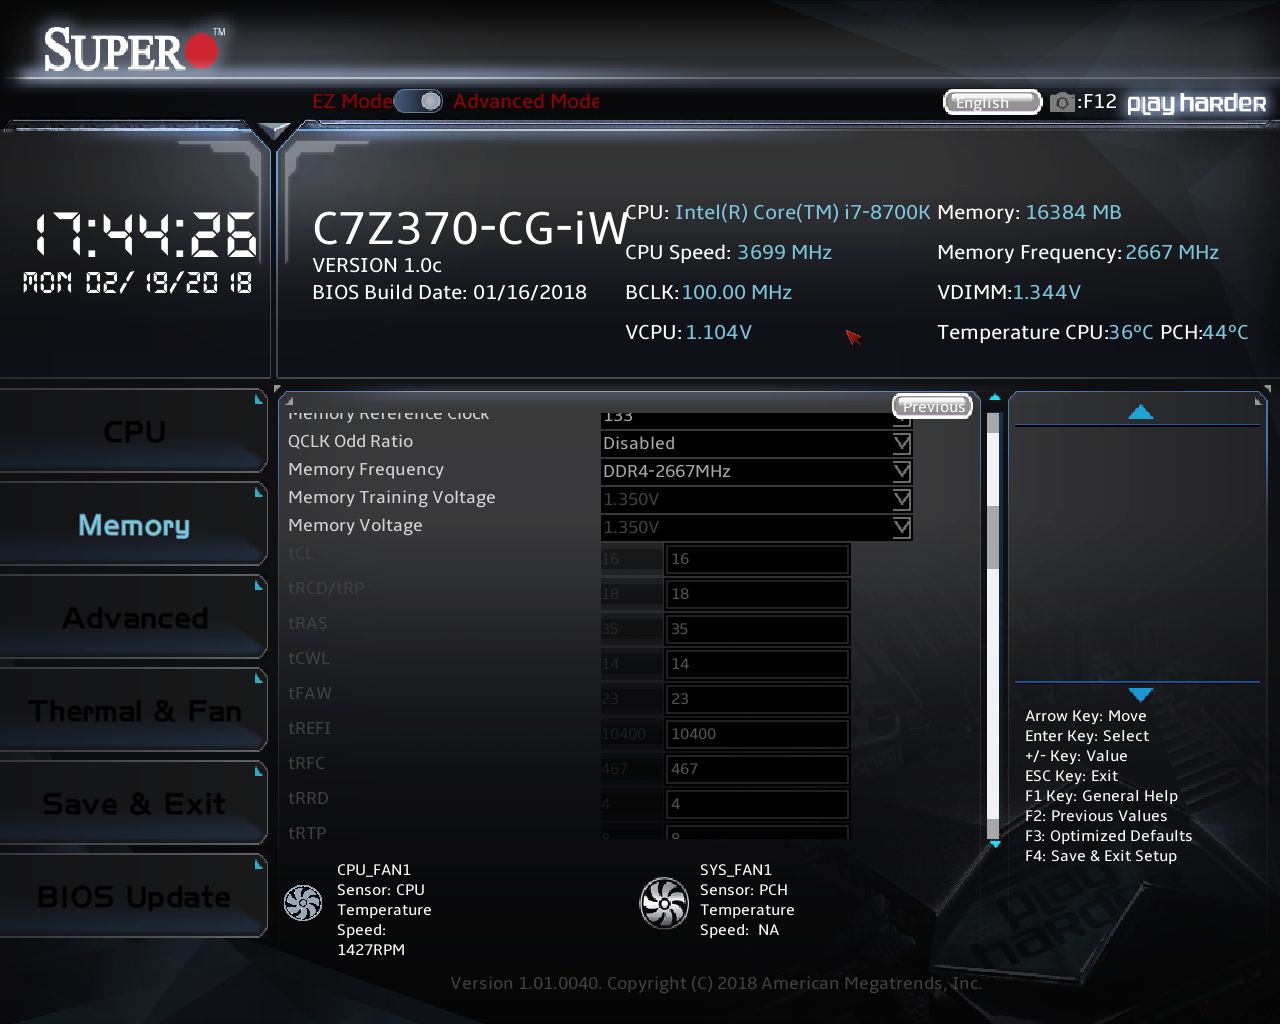
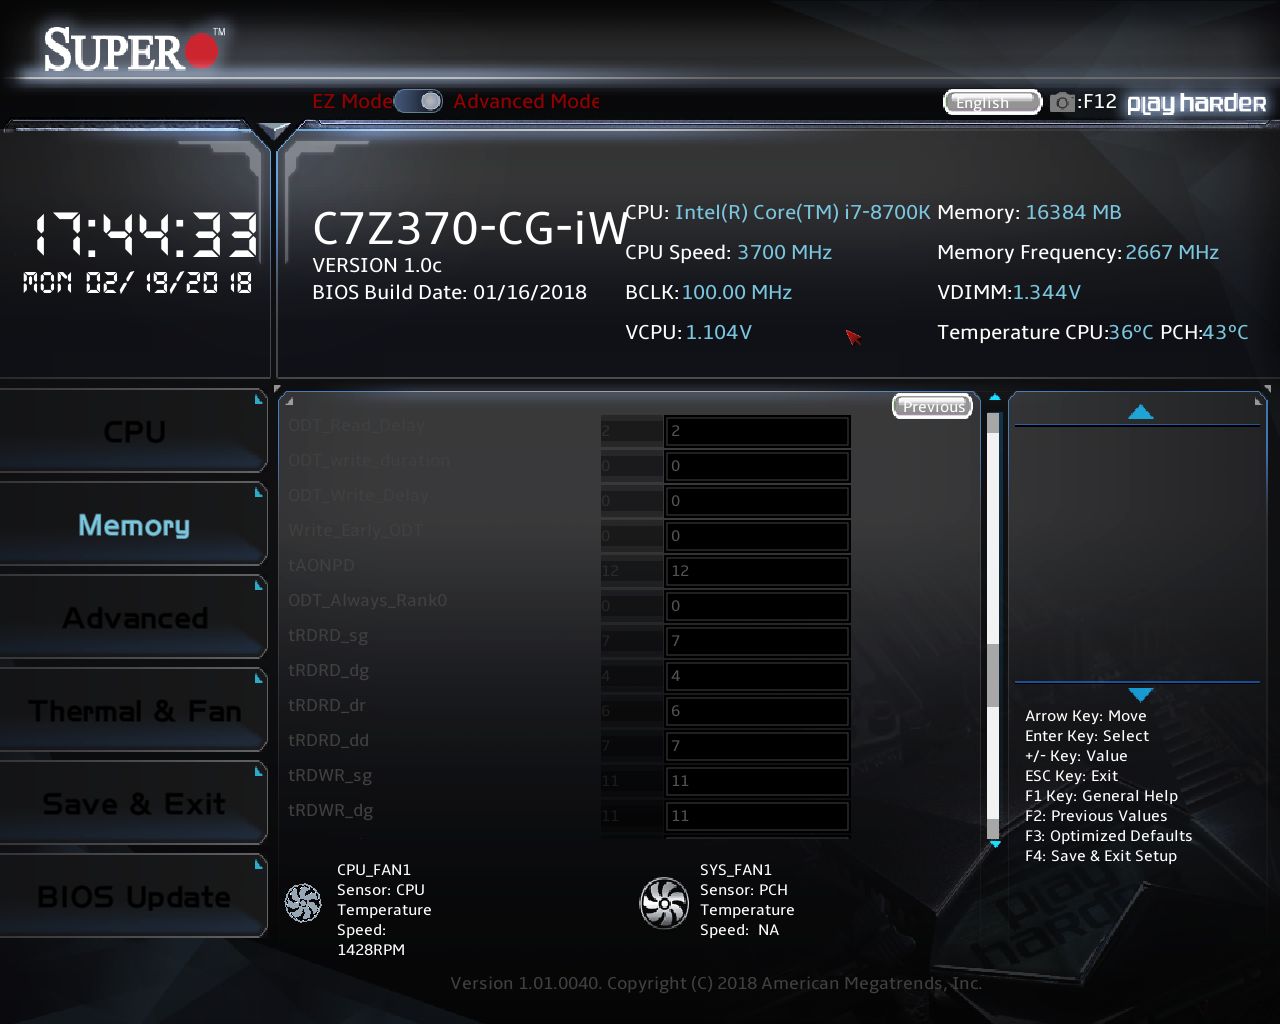
The Memory section holds the keys to editing anything memory related. Users are able to enable XMP profiles, change memory frequency, timings, and voltage within this section. The board offers a lot of primary, secondary, and tertiary timings that can all be edited. There still needs to be tweaking with this design however, as shown with the inability to line up values in the list below.

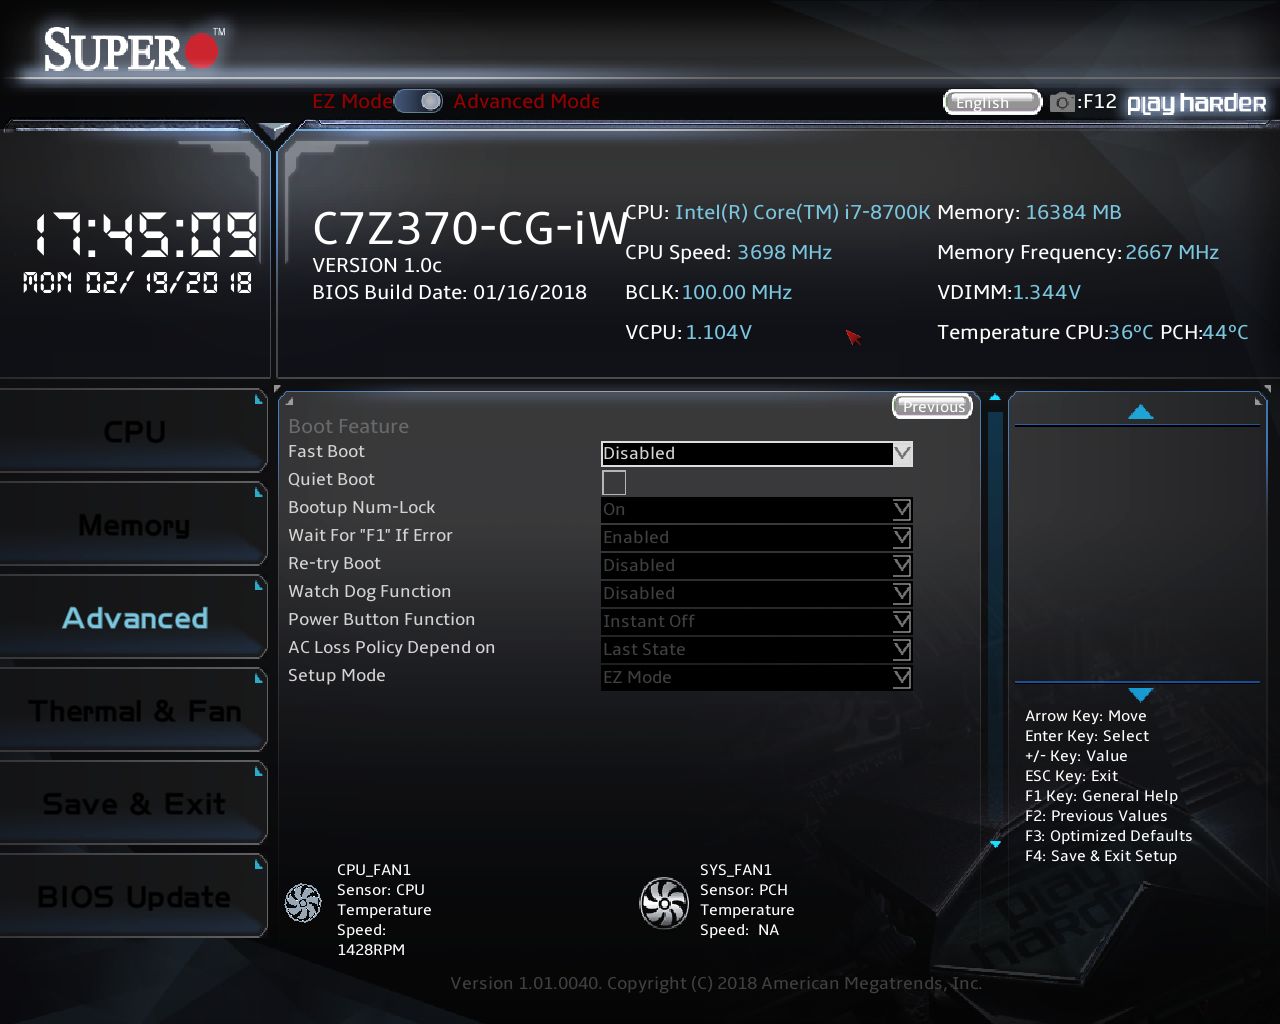
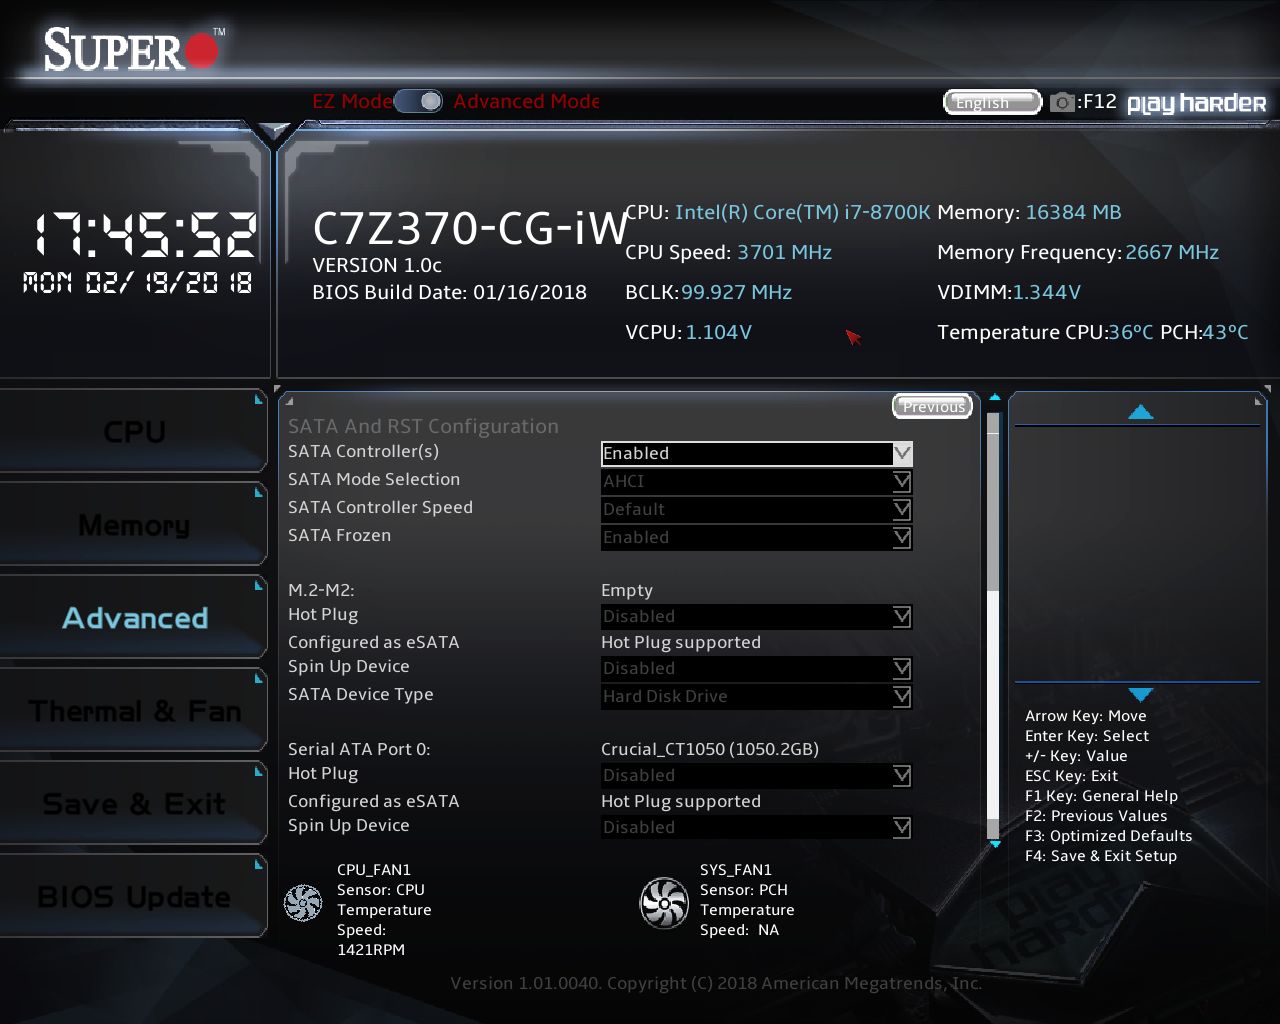
The Advanced section contains multiple sub-headings where system features are able to be accessed and edited. Items such as Boot Features, Graphics Configuration, SATA and RST Configuration, and USB configuration among several others.
The Thermal & Fan section displays system temperatures as well as voltages from the power supply as well as internally on the motherboard. Inside this section, users are able to configure fan speeds for each header. There are standard profiles as well as the ability to customize each.

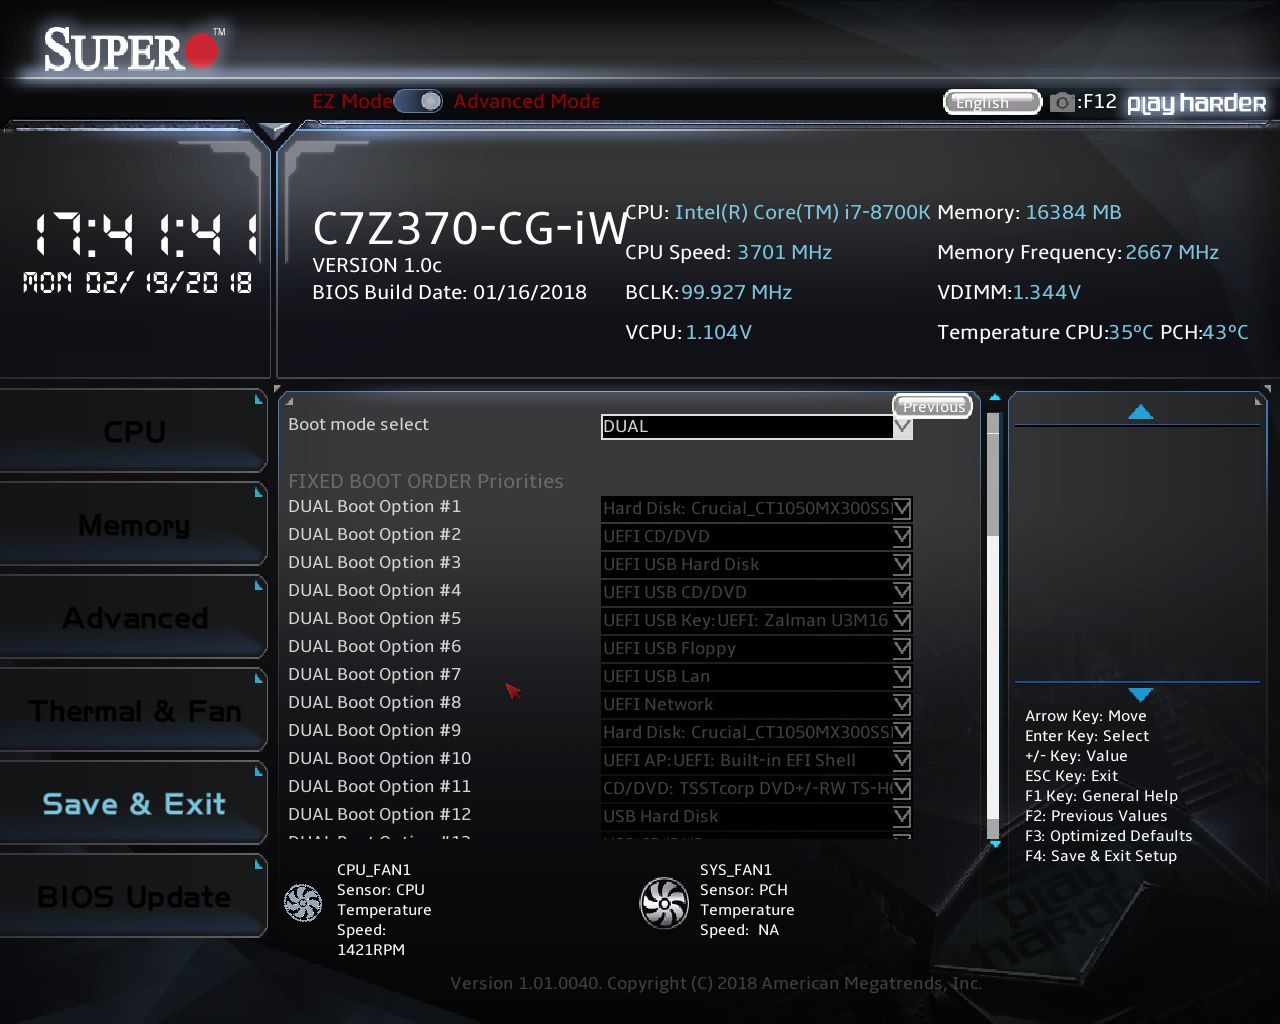
The Save and Exit section contains boot mode selections (Legacy and Dual) as well as boot order priorities. In order to get the board to recognize my standard SSD in the boot order, I needed to change it to 'Dual' upon first boot. Though oddly enough, once I selected dual and set back to optimized defaults, the drive was still there even though it was in Legacy mode again.
Last but not least is the BIOS Update page. When selecting the Start Update function on this screen we are prompted to go to the SuperO website to download it, or not. If you click No, it will then open up a dialog box looking for the BIOS file. In previous generations it has been a struggle to update the BIOS on these sorts of boards, however we are glad to now have the option.
Overall, the BIOS worked out pretty well. As mentioned earlier, if you are not used to these BIOSes from SuperO, it may take some getting used to, however, almost all functions are there. I would like to have seen current limit settings as well as an LLC option so as to bypass the strict power limits (see overclocking section) and stabilize voltage under load.


Software
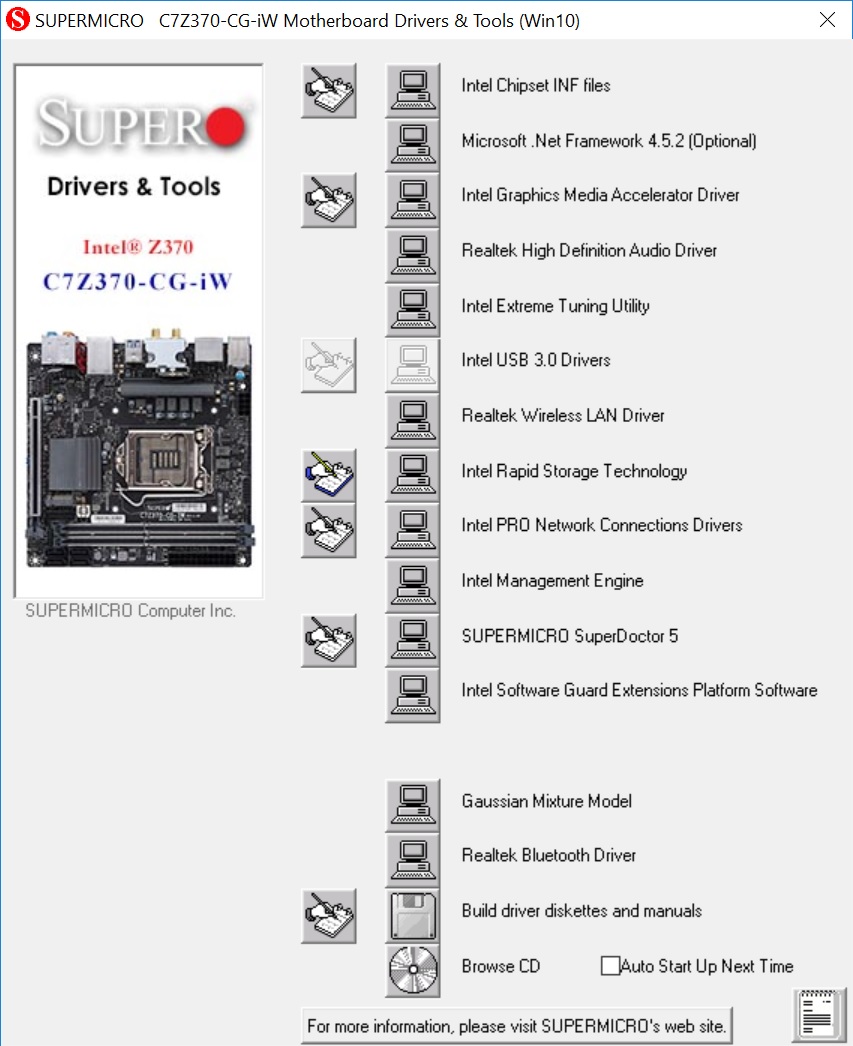
The SuperO C7Z30-CG-IW's driver disk offers a basic list of drivers and software used to set up the system properly. Simply click on any of the buttons and the software will install, however there is not an 'install all in one shot' option (with the ability to deselect items not needed) as with the primary motherboard manufacturers. The latest drivers will need to be downloaded from the website as this disk as there is no live update tool.
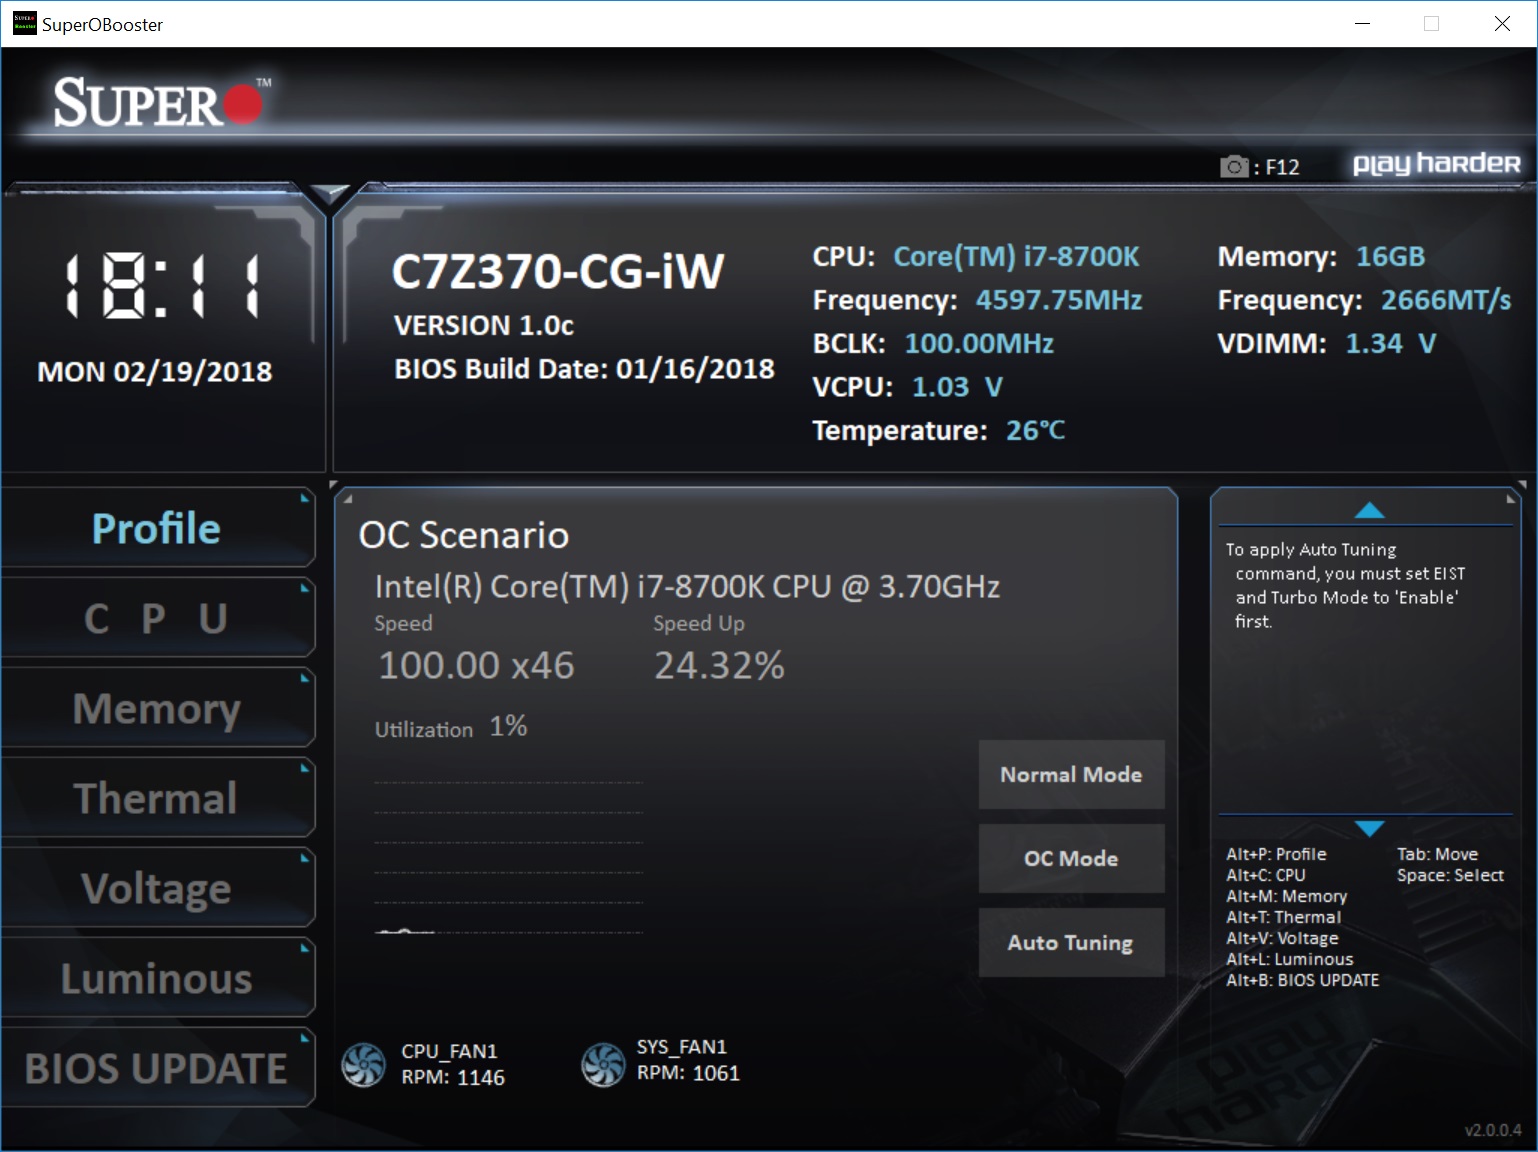
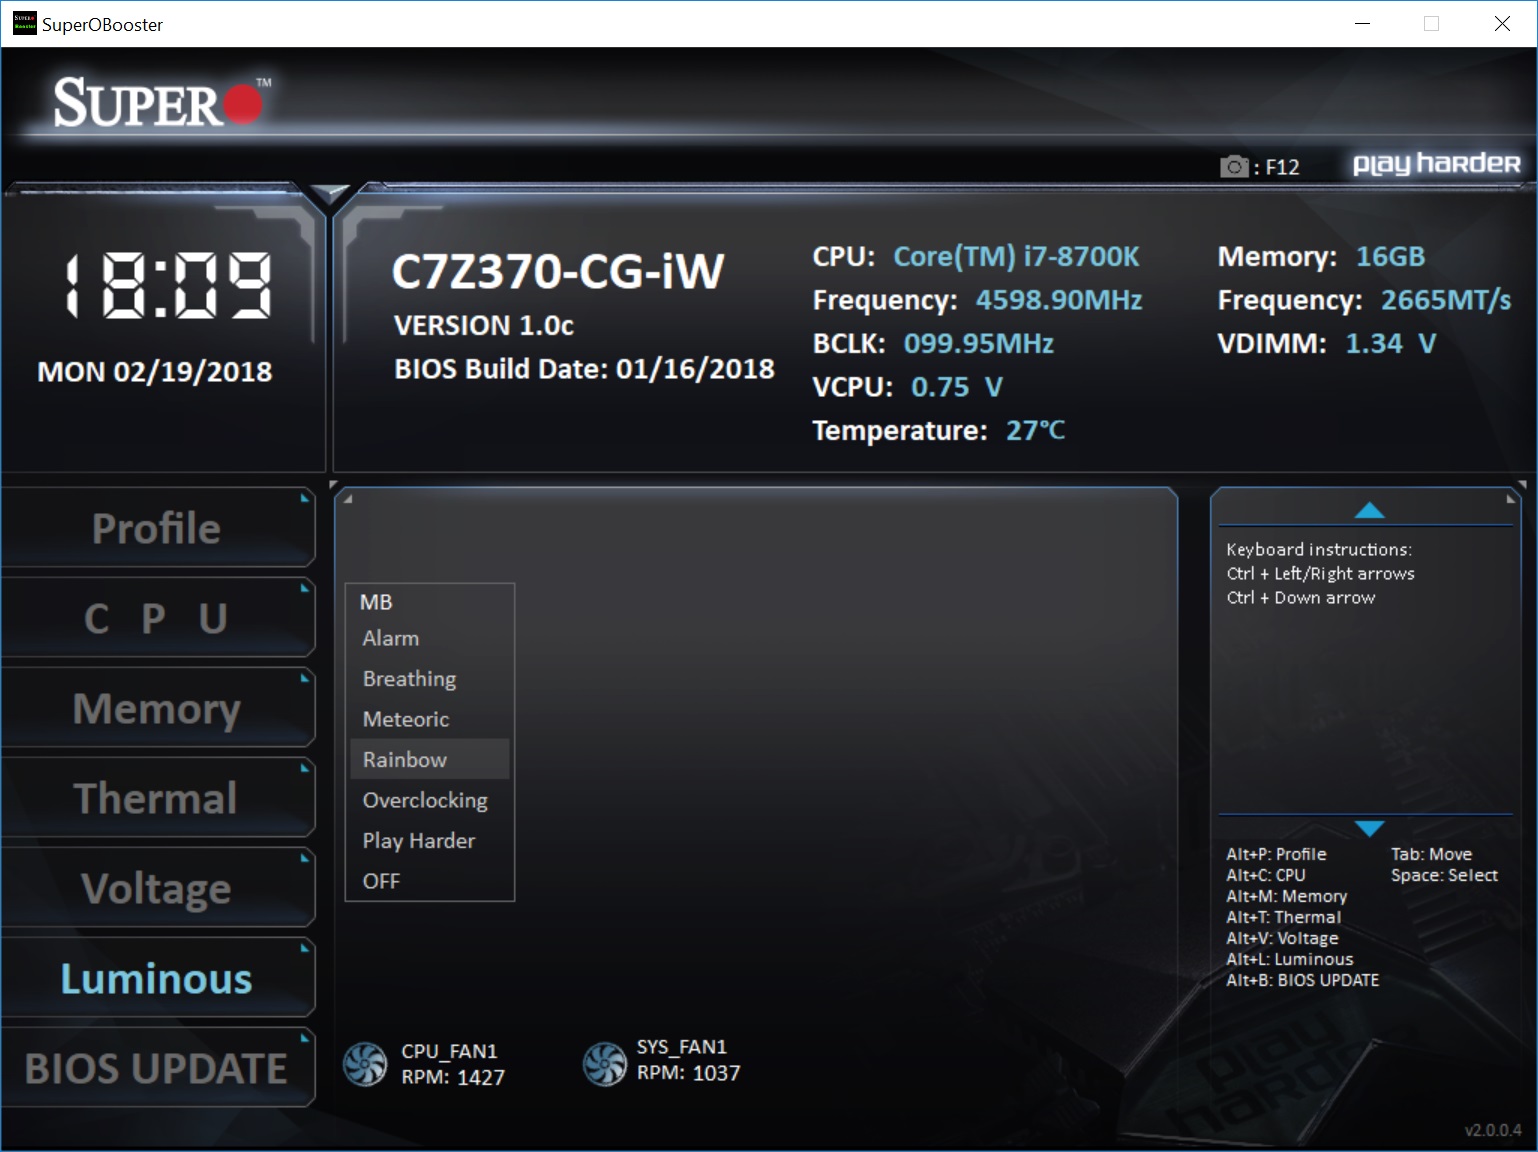
The SuperOBooster software is SuperO's Windows-based utility for monitoring and overclocking/tweaking the system, updating the BIOS, as well as controlling the RGB LED lighting on/attached to the board. It also has profiles for overclocking with an OC Mode and an Auto Tuning function said to find the best overclock for the board.
The Luminous section below is used for manipulating the RGB LEDs on board. It has a total of six different profiles users are able to select plus an off function to set these up just the way the user likes.
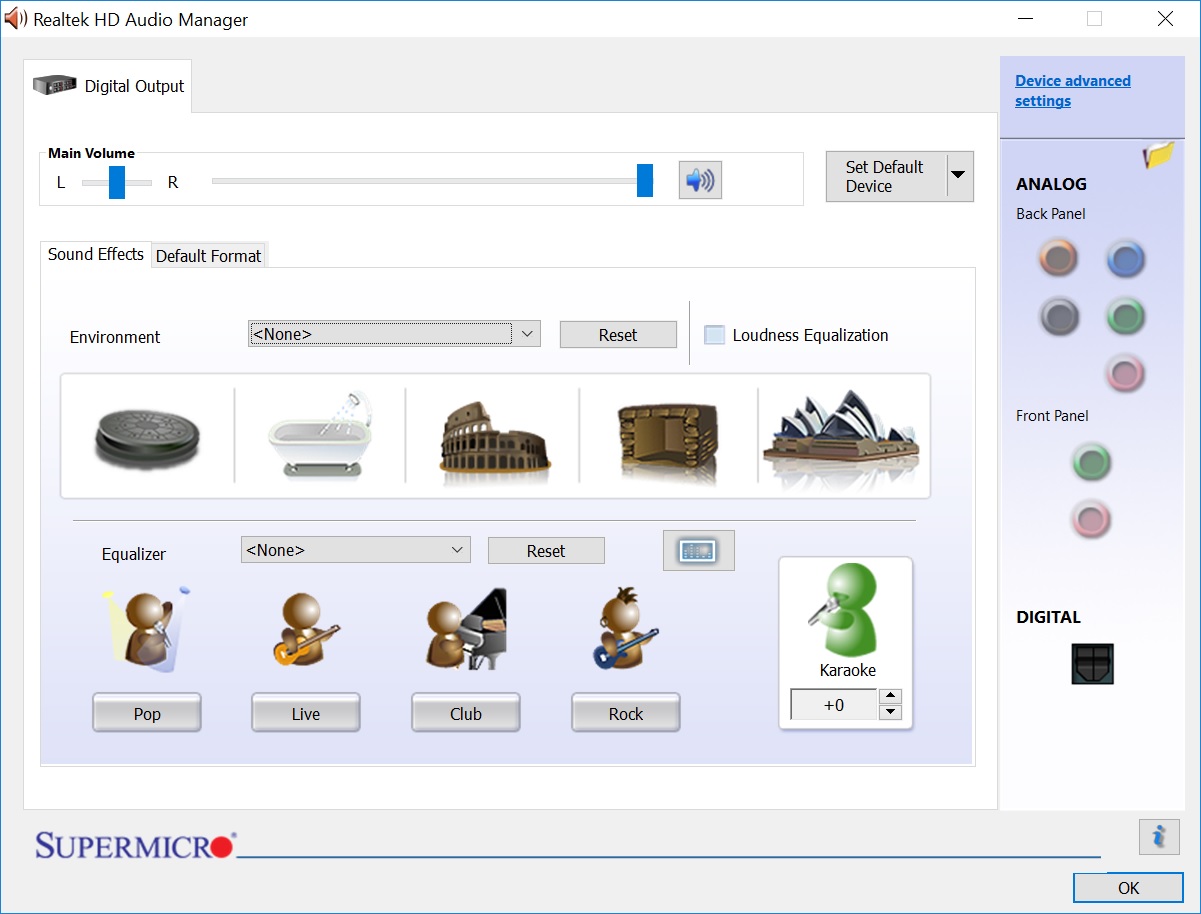
For Audio, SuperO uses the premium ALC1220 codec and does not use additional software on top. Below is the Realtek HD Audio Manager software used to adjust any audio feature from pre-defined room acoustics to custom equalization. Your audio options will all be found here.


31 Comments
View All Comments
Roen - Monday, April 30, 2018 - link
Still the only 300 series ITX board to have Gen 2 Type A and Type C ports available.Surprised that this spec is so difficult to achieve.
DanNeely - Monday, April 30, 2018 - link
It's another chip to be squeezed onto a board lacking in room for chips.Halfnidea - Wednesday, May 2, 2018 - link
I'm sorry but I have an issue with the use of the word: "Still" Btw, I had installed a Biostar X370 GTB 2 months ago. Gen 2 USB A and C - confirmed. Not taking my word for it? Small Form Factor did an article back in September; where i learned about it as well.Roen - Thursday, May 17, 2018 - link
Let me rephrase: Intel 300 series.Beaver M. - Tuesday, May 1, 2018 - link
A board like that should still have a mPCIe slot. Theres just too many useful mPCIe cards available and they are not available as M.2 yet.Woomack - Monday, May 7, 2018 - link
Re Overclocking, LLC have to set separately for AC/DC and you configure it in Advanced tab/GT Slice ( don't ask me why there and not in CPU OC tab ). It affects CPU and IGP. I have no idea why they made it this way but it works.I was able to set 5.1GHz on 8600K / AIO cooler, for my review couple of weeks ago.
Max OC profile which was stable for me was 4.8GHz. Like pick from the list, save settings and it works.
Max stable memory clock was DDR4-3866, max boot with single stick DDR4-4000.
Overclocking on this board isn't easy but it's also not so bad once you figure out all settings.
Roen - Thursday, May 17, 2018 - link
Run any power draw test to see if your OC hits current limit throttling in XTU.Run memtest86 and see if you have any errors.
I can't get above 4.5 GHz non-AVX, 4.0 GHz AVX, and 2666 MHz to pass memtest86, with screenshots to prove. Using delidded 8700K and multiple Samsung B-die kits.
I actually have issue with many of the reviews out there not properly pushing the board to its limits to identify its weaknesses. Anandtech review completely mirrors my experience.
An OC isn't stable if it has more failure conditions than stock, that's my OC philosophy and that's how I test my boards.
Roen - Thursday, May 17, 2018 - link
I can't get above 4.5 GHz non-AVX, 4.0 GHz AVX in Prime95 before current throttling hits in XTU.Roen - Thursday, May 17, 2018 - link
Prime95 and memtest86 should be the minimum tests that people run, evne if they are unrealistically strict. Stock chips / boards can pass these tests with flying colors, OC'ed things should be able to as well, if they are to be called stable.Rene23 - Wednesday, May 9, 2018 - link
It's using the wrong platform, need X470 AM4 instead, ..! ;-)