The ASRock X99E-ITX/ac Review: Up to 36 Threads in Mini-ITX
by Ian Cutress on June 24, 2015 8:00 AM ESTMuch of the detail of the ASRock X99 BIOS is similar to that in our previous ASRock X99 motherboard reviews (Extreme11, OC Formula, X99-E/WS 10G, Extreme6). As a result we have copied the description and included it here for clarity, updated for the X99E-ITX/ac specific options.
ASRock X99E-ITX/ac BIOS
The ASRock BIOS shifted slightly between Z87 and Z97, and it is the Z97 implementation we get on X99. This means the starry background is gone, replaced with a dark and blue-crystalline image. The icons are also reduced to mere text with a small image, and unlike the ASUS BIOS the menu sections are of equal size, which I prefer. There is also an adjustment to the OC Tweaker layout, which we will come to.
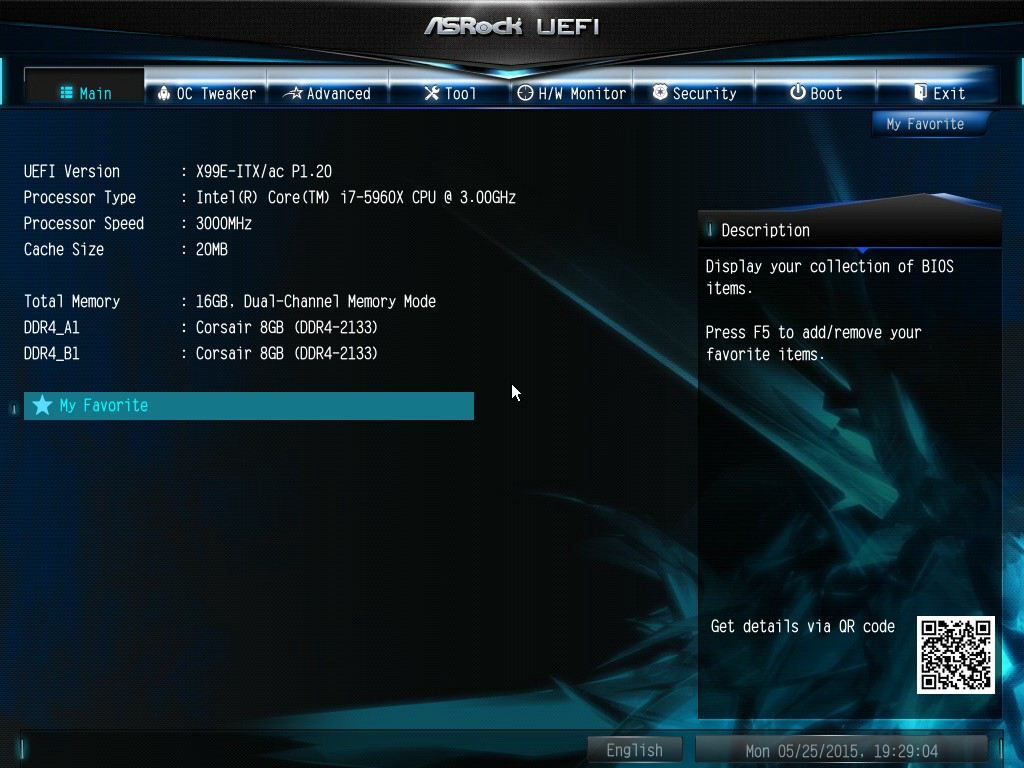
There is no ‘Easy Mode’ for the ASRock BIOS, with entry direct into this first Main screen. The right hand side of the BIOS is for description of the option selected, and the main segment shows information such as the BIOS version, CPU installed, CPU speed and memory installed. As mentioned in previous reviews, having some set of information relating to CPU voltages, temperatures and fan speeds might be useful here. If ASRock was to do an Easy Mode, it would make sense to have a one-button overclock option as well.
OC Tweaker takes heed of one of my previous complains about the ASRock overclock options. Previously there used to be a long list of options that continuously grew, depending on what options were left open to the user. For X99, ASRock has condensed these options into separate submenus similar in design to those we see on a GIGABYTE motherboard. Note that ASUS and MSI BIOSes currently go half-way between these extremes, offering some basic options with the more advanced ones in separate menus.
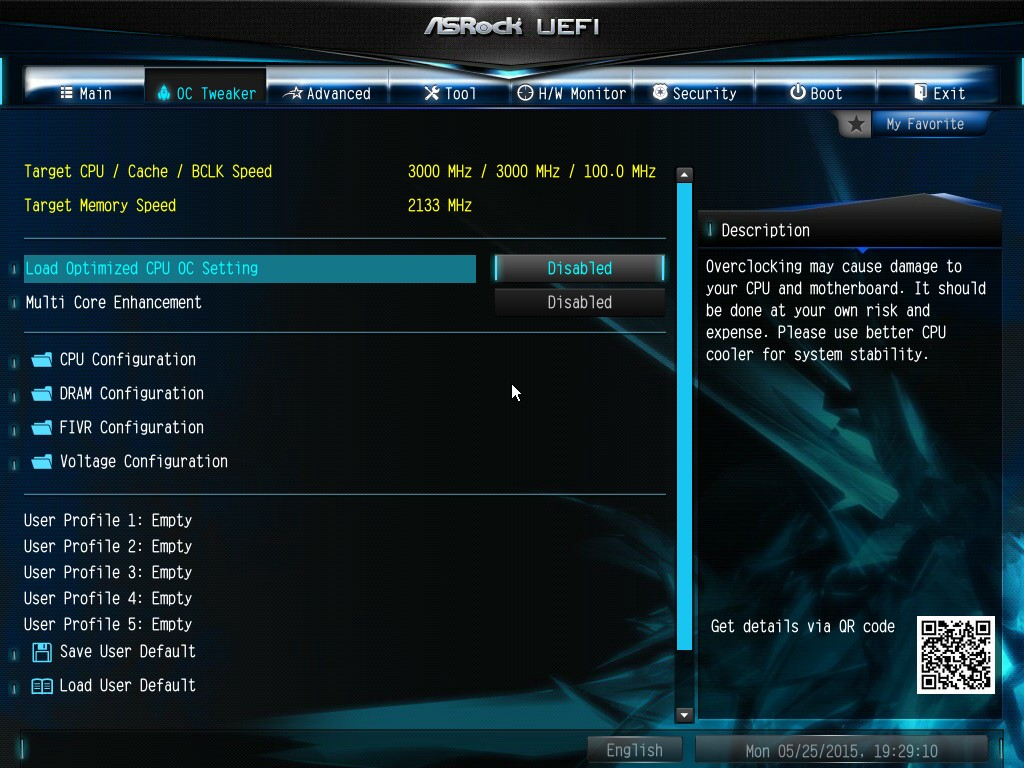
ASRock cuts straight to the chase – the first two options deal with overclocking. We have touched on features like Multi Core Enhancement many times previously, but it is interesting to have it so high up on the list of options. The Optimized CPU OC Setting gives an easy selection for overclocks based on ASRock’s internal testing:
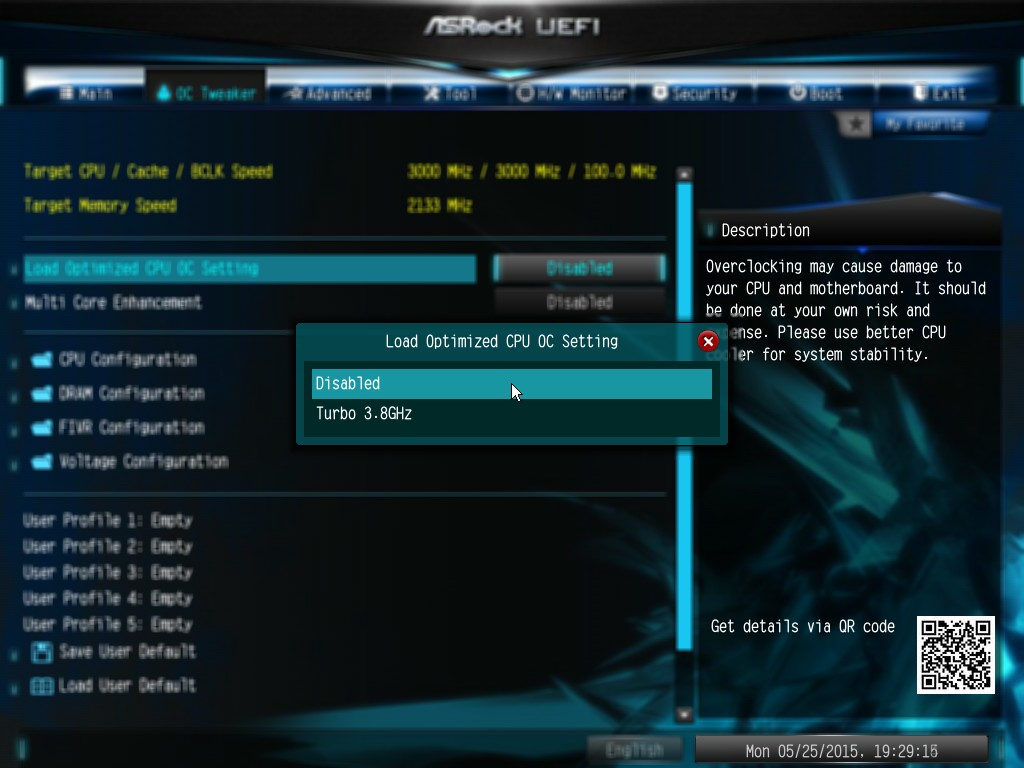
ASRock has been conservative with only offering a 3.8 GHz option here – normally we see 4.0 / 4.2 / 4.4 / 4.5 options, some of which will push the best CPUs. By virtue of having a smaller system, which might be more temperature sensitive, only one option is offered. Personally I would prefer to have the other options as well.
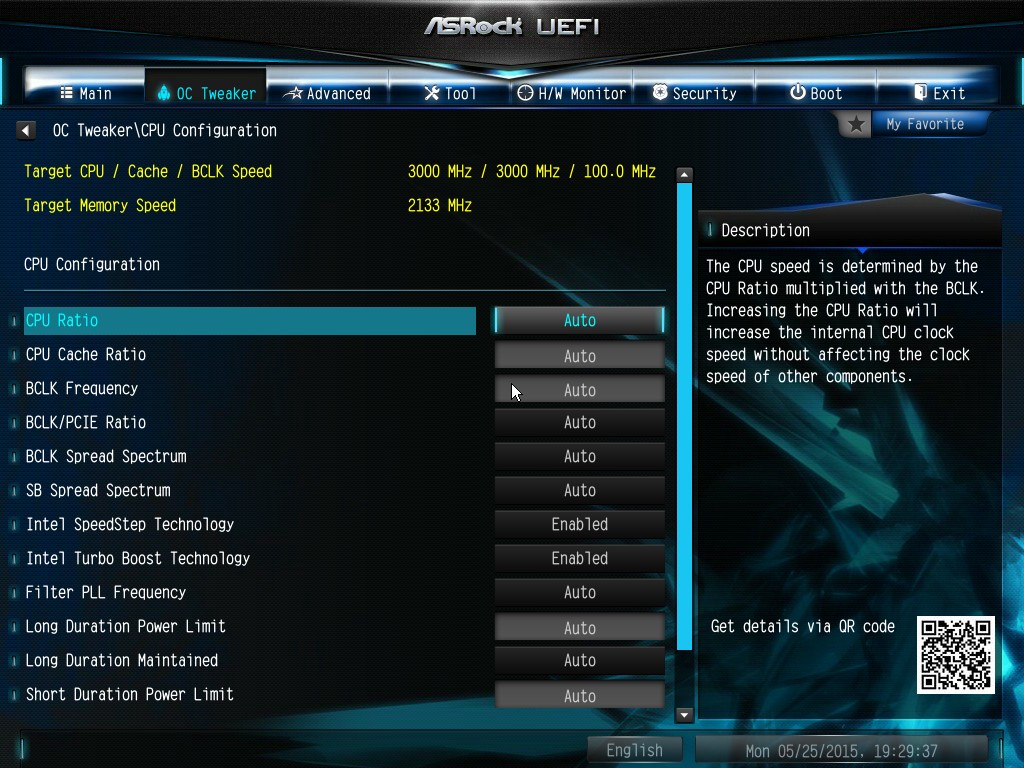
The OC Tweaker menu is split into four sections. CPU Configuration gives options for CPU Ratio, multiplier, frequency, turbo boost and power limits:
DRAM Configuration allows for XMP application, DRAM strap adjustment, DRAM voltage and sub-timing adjustment, all the way through primary timings, secondary timings, tertiaries and others.
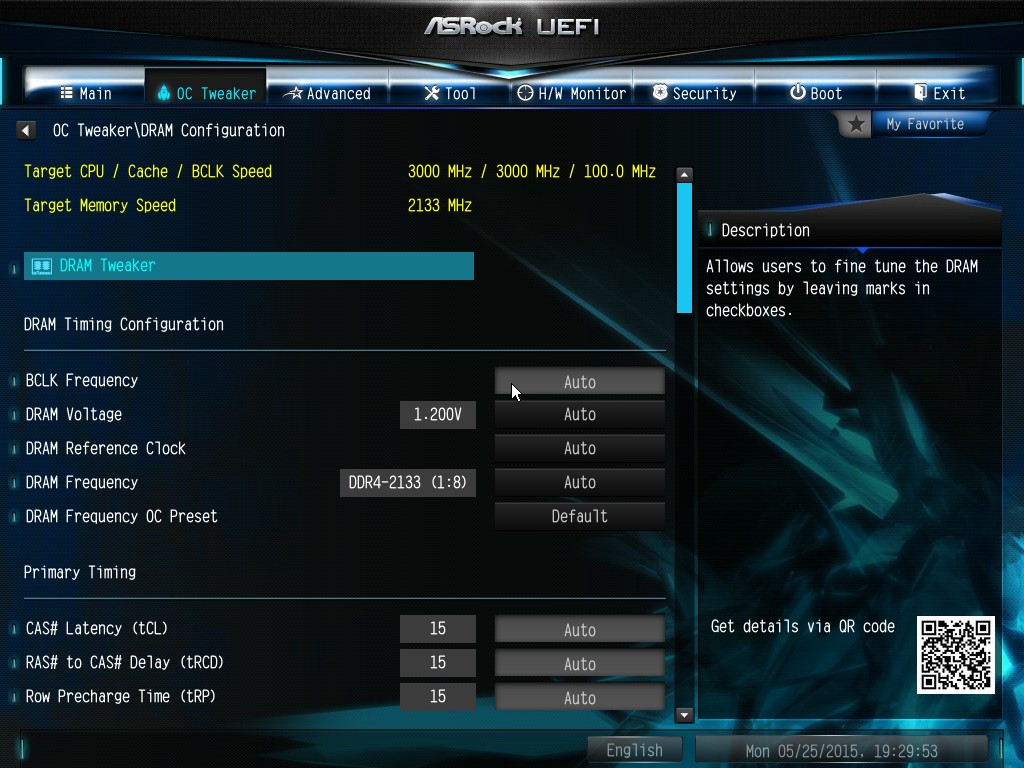
ASRock still uses the DRAM Tweaker function to fine tune the JEDEC and XMP responses to each memory kit. The ASRock BIOS also offers a DRAM Frequency overclocking preset list which will adjust the CPU strap and BCLK frequency needed to achieve various speeds.
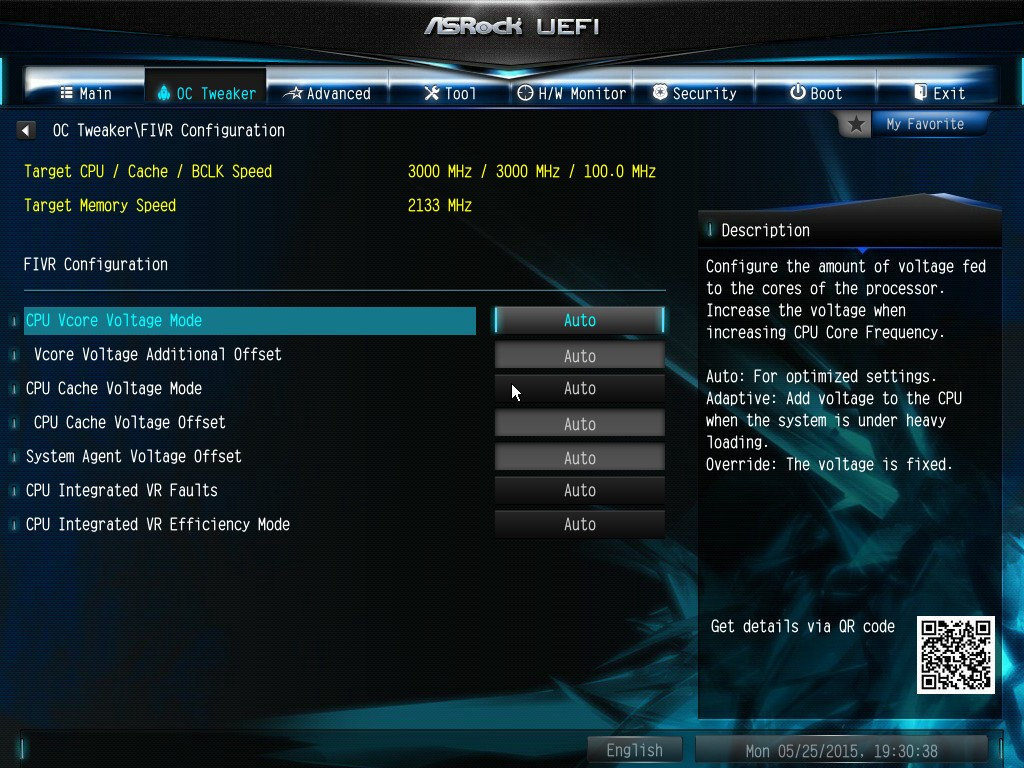
The FIVR Configuration menu from the OC Tweaker page deals primarily with the CPU and CPU Cache/uncore voltages.
The Voltage Configuration menu has the other voltages on the system, including VCIN to the FIVR and load line calibration. The Load Line Calibration option also comes with a handy graph showing what each setting means:

Unfortunately this arrangement of voltages is mildly confusing. Typically an overclocker will adjust the CPU voltage and the Load Line Calibration settings enough to get the right combination, and ASRock has placed these options in two different menus. If the CPU VCore option could be duplicated in the Voltage Configuration menu, this would be preferable.
The Advanced tab deals with other elements of the system configuration, such as the chipset, storage and super IO calibrations. This includes fixing power modes, PCIe linking speeds, disabling or enabling onboard controllers and adjusting RAID configurations.

An adjustment to the X99 BIOS is that the Active Page on Entry setting has been moved here.
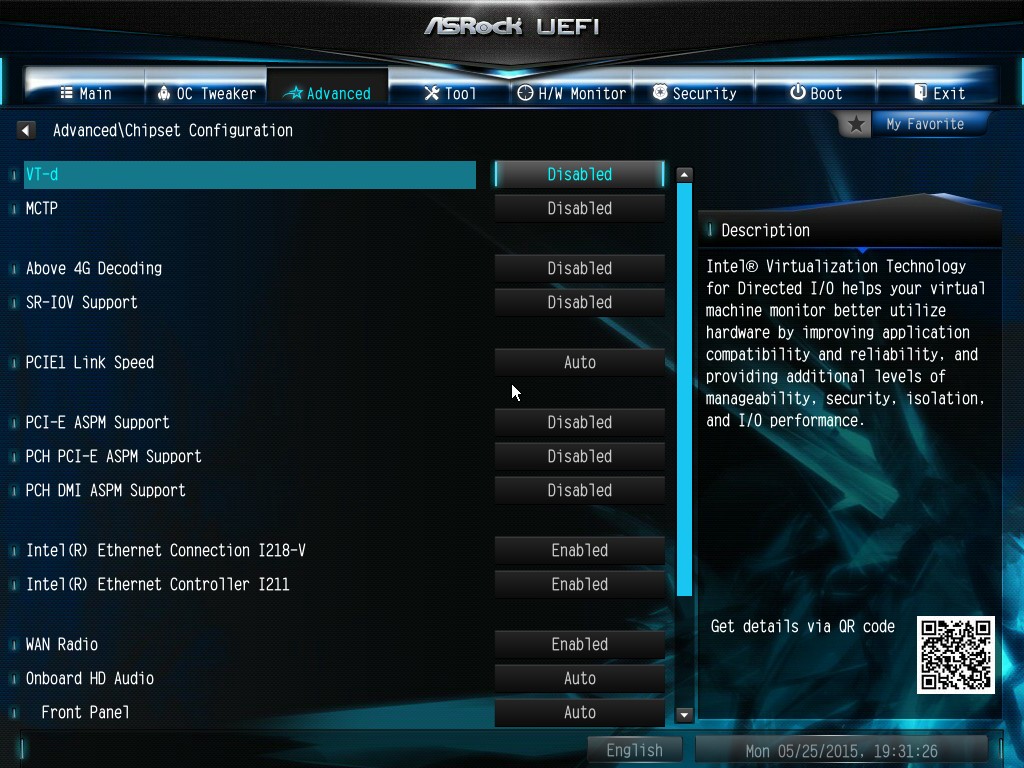
By default the ‘Above 4G Decoding’ inside the Chipset Configuration menu is disabled, for users that want PCIe coprocessors that require this feature.
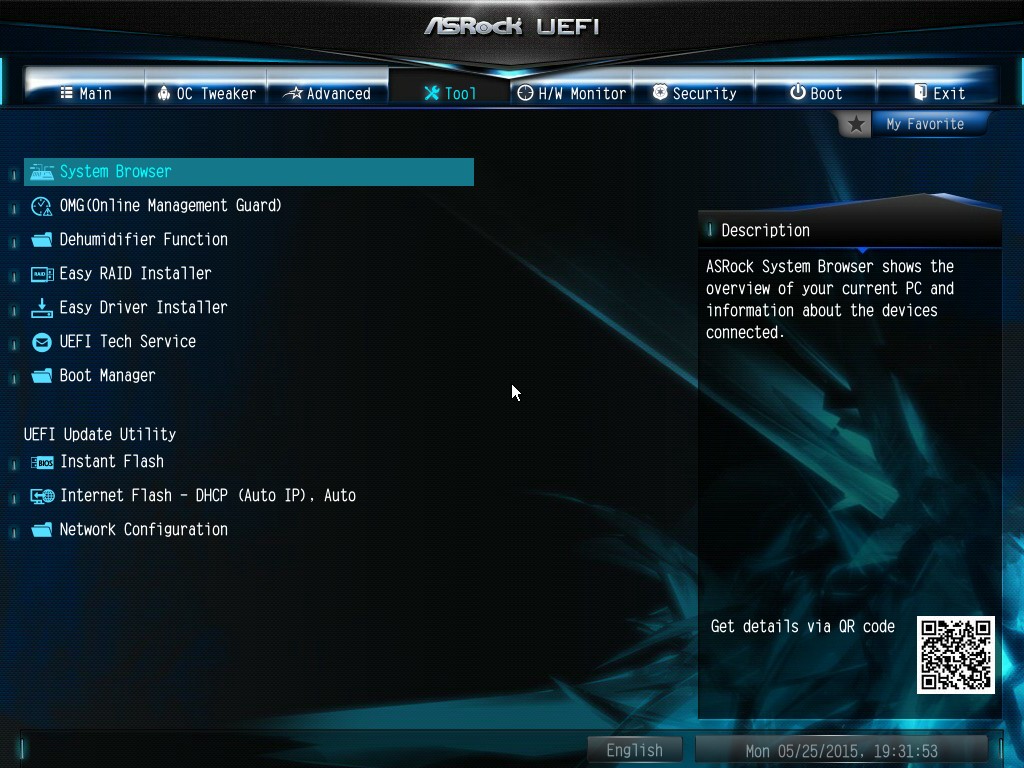
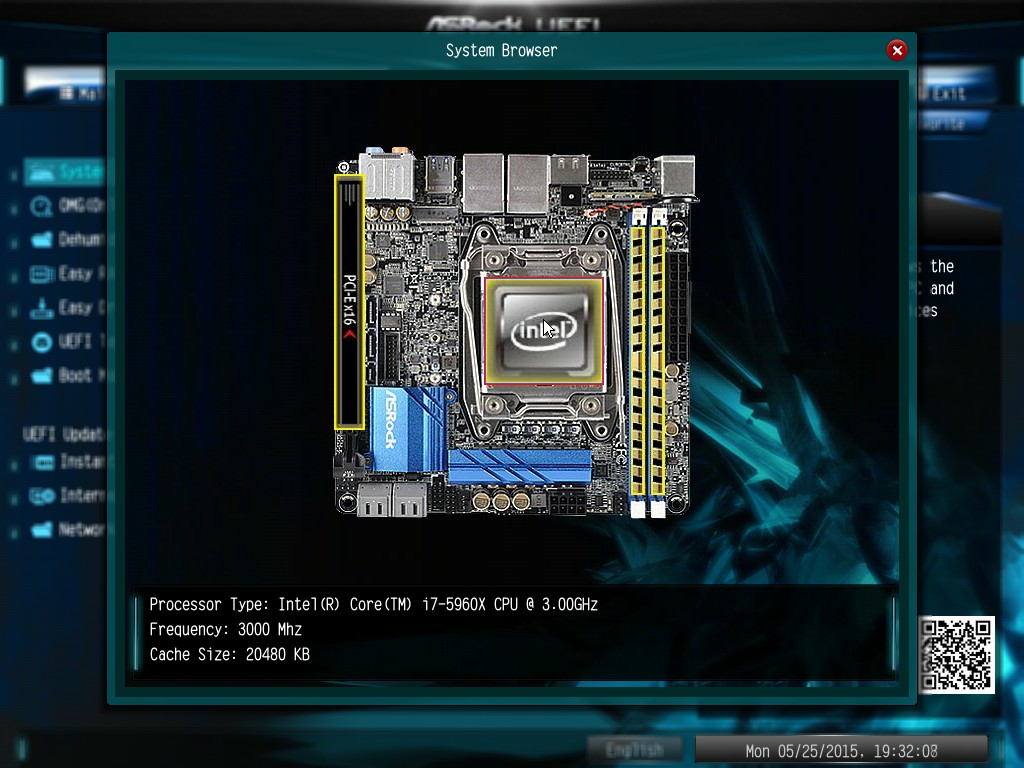
The Tools menu is typically where ASRock tries out its more unusual ideas, although we do not get anything new for X99 that we have not seen on Z97 already. The System Browser shows the different elements of the motherboard and what is detected:
The Online Management Guard (OMG) allows the user to enable or disable the network ports at various times of the day, as determined by the system time:
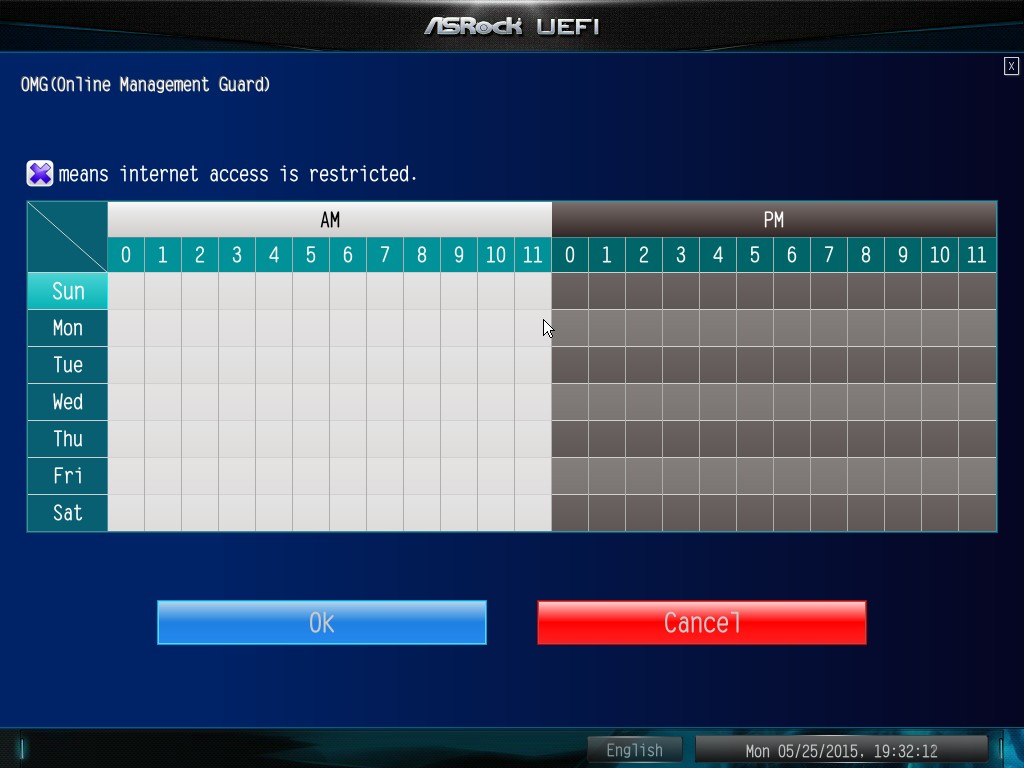
(It is amusing that this feature is aimed more at controlling when a child is allowed online, but X99 is not exactly a system configuration used as secondary machines.)
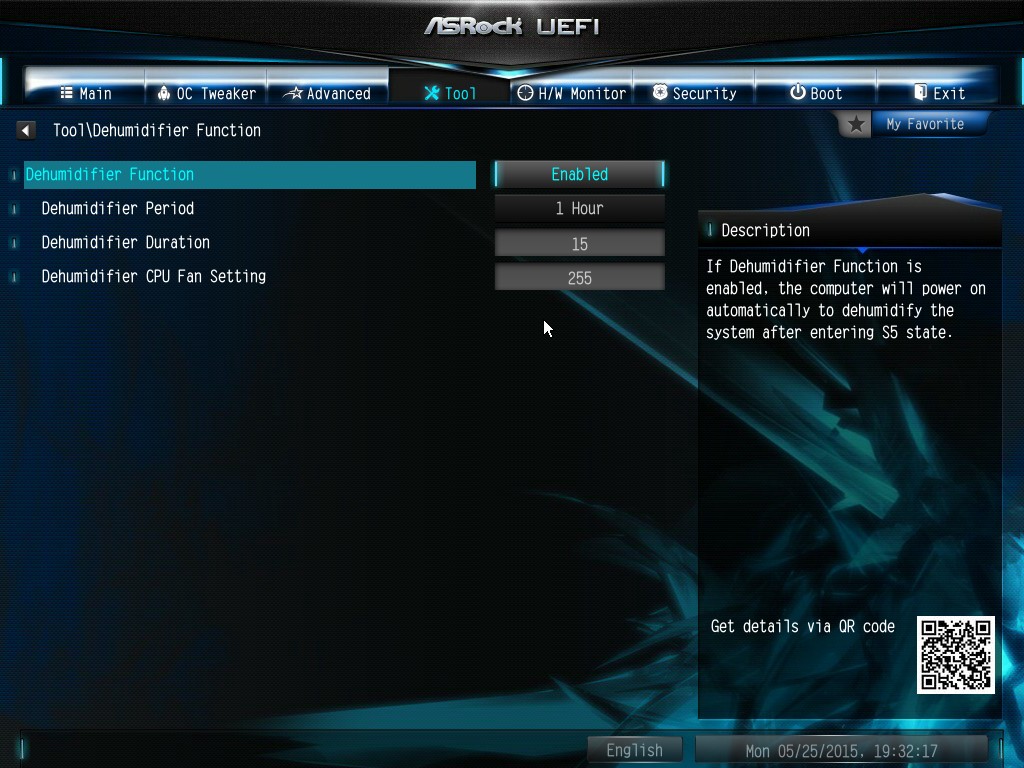
The Dehumidifier function now gets its own sub menu, allowing fans to spin for a fixed time after the machine is in S5:
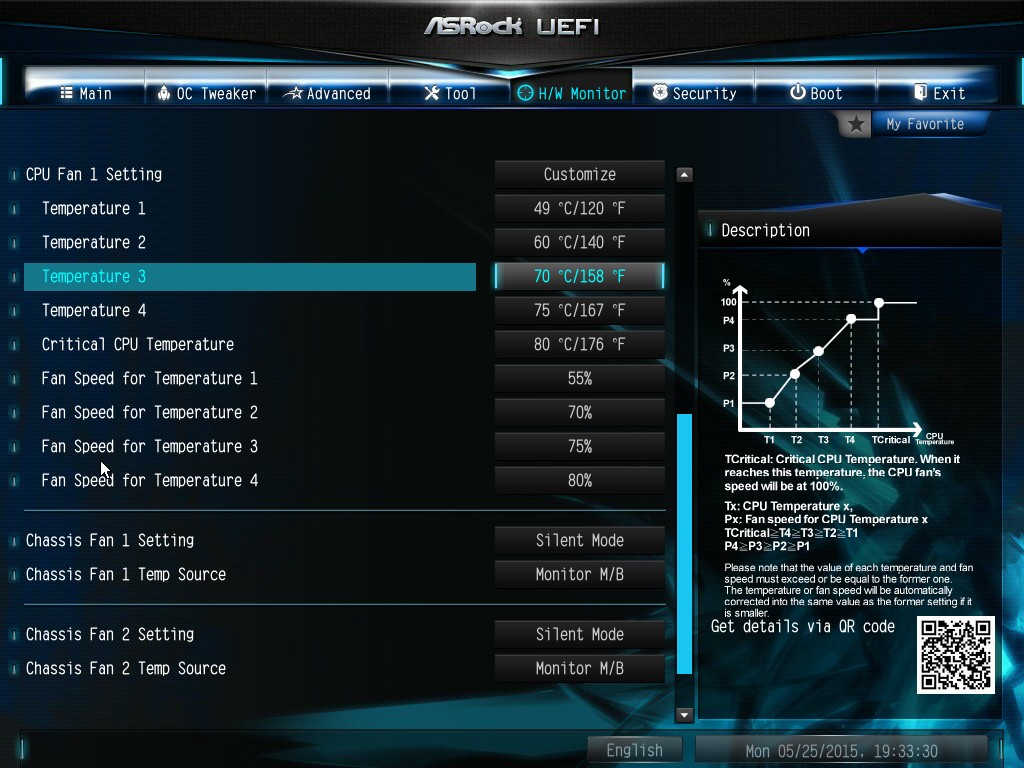
The H/W Monitor tab is where the temperatures, fan speeds and voltage monitoring tools are all kept, and we have seen an effort by the other manufacturers to improve the fan control situation. ASRock now joins them with the FAN-Tastic tuning option, moving into a more interactive type of scenario. This extends the multi-point gradient options into something more clickable, similar to the ASUS implementation. For example, a user can put a fan into one of five modes or customize the profile:

Rather than using the interface, users can do it the older way:
There is also an option to select which temperature sensor is being read from to make these adjustments.
The rest of the BIOS deals with security, boot order and fast boot options. In the Save and Exit menu we do get options for Boot Override:


56 Comments
View All Comments
gw74 - Sunday, July 19, 2015 - link
what about in the future when USB-C becomes the standard?dj_aris - Wednesday, June 24, 2015 - link
Any shot of the backside picturing the M.2 slot?vnangia - Wednesday, June 24, 2015 - link
?? The M.2 slot is on the top side, between the CPU and the SATA/SATA Express ports. Look right of the USB3.1 headers, below the network port. See the thing that sees Ultra M.2?dj_aris - Wednesday, June 24, 2015 - link
Yup! Didn't notice, expecting to find it in the back line Z97-ITX...Gadgety - Wednesday, June 24, 2015 - link
I'm always intrigued by those pushing the limits, and this is it. Could this not run the small size dual GPU Fiji solution Lisa Su showed recently. Or would the the dual channel memory stand in the way?Flunk - Wednesday, June 24, 2015 - link
The memory slots are on the other side of the board, so I can't see how that would make any difference. As for memory performance, there is no reason to think that would be an issue with a dual-GPU Fiji card. Most current motherboards are dual-channel.farhadd - Wednesday, June 24, 2015 - link
With a 36 thread CPU ceiling, it would have been nice to see more than 32GB of RAM supported. But I suppose if you want a VFX beast you're probably not buying Mini ITX.vnangia - Wednesday, June 24, 2015 - link
Don't you need to use ECC with the Xeons? ECC DDR4 seems to be available in 32GB modules (see, for example, Samsung's here - http://www.newegg.com/Product/Product.aspx?Item=N8... ), so you could go to 64GB.tarak73 - Wednesday, June 24, 2015 - link
This board doesn't support ECCyuhong - Wednesday, June 24, 2015 - link
From http://www.asrock.com/mb/Intel/X99E-ITXac/?cat=Spe... :"Supports DDR4 ECC, un-buffered memory/RDIMM with Intel® Xeon® processors E5 series in the LGA 2011-3 Socket"