The ASUS Z170-A Motherboard Review: The $165 Focal Point
by Ian Cutress on October 20, 2015 2:00 PM EST- Posted in
- Motherboards
- Asus
- ATX
- Skylake
- Z170
In the world of technology, you could speculate if there is ever a golden age, or a renaissance. All the time we expect technology to grow and improve, being better than the last. Sometimes there is nostalgia, but it never stops us using the latest because it provides the user experience we expect at a minimum. Like all the motherboard manufacturers, I've followed ASUS for years, and observed their constant iteration as platforms evolve. The newest Skylake platform is upon us, and we review the ASUS Z170-A motherboard to see their interpretation of the desktop this generation.
Other AnandTech Reviews for Intel’s 6th Generation CPUs
- Skylake-K Review: Core i7-6700K and Core i5-6600K – CPU Review
- Comparison between the i7-6700K and i7-2600K in Bench – CPU Comparison
- Overclocking Performance Mini-Test to 4.8 GHz – Overclocking
- Skylake Architecture Analysis – Architecture
- Z170 Chipset Analysis and 55+ Motherboards – Motherboard Overview
- Discrete Graphics: An Update for Z170 Motherboards – PCIe Firmware Update
100-Series Motherboard Reviews:
To read specifically about the Z170 chip/platform and the specifications therein, our deep dive into what it is can be found at this link.
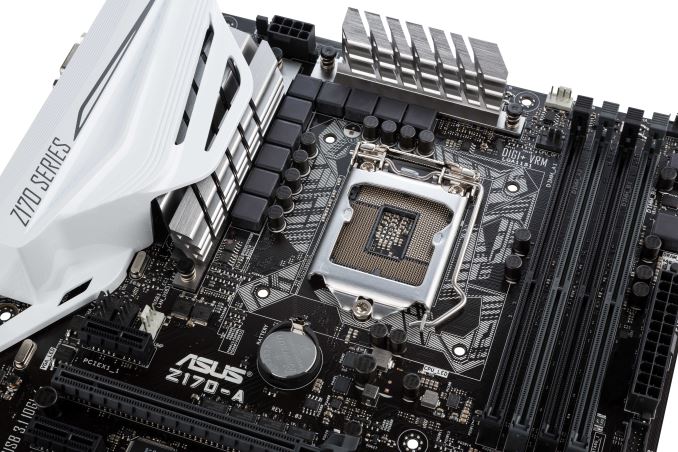
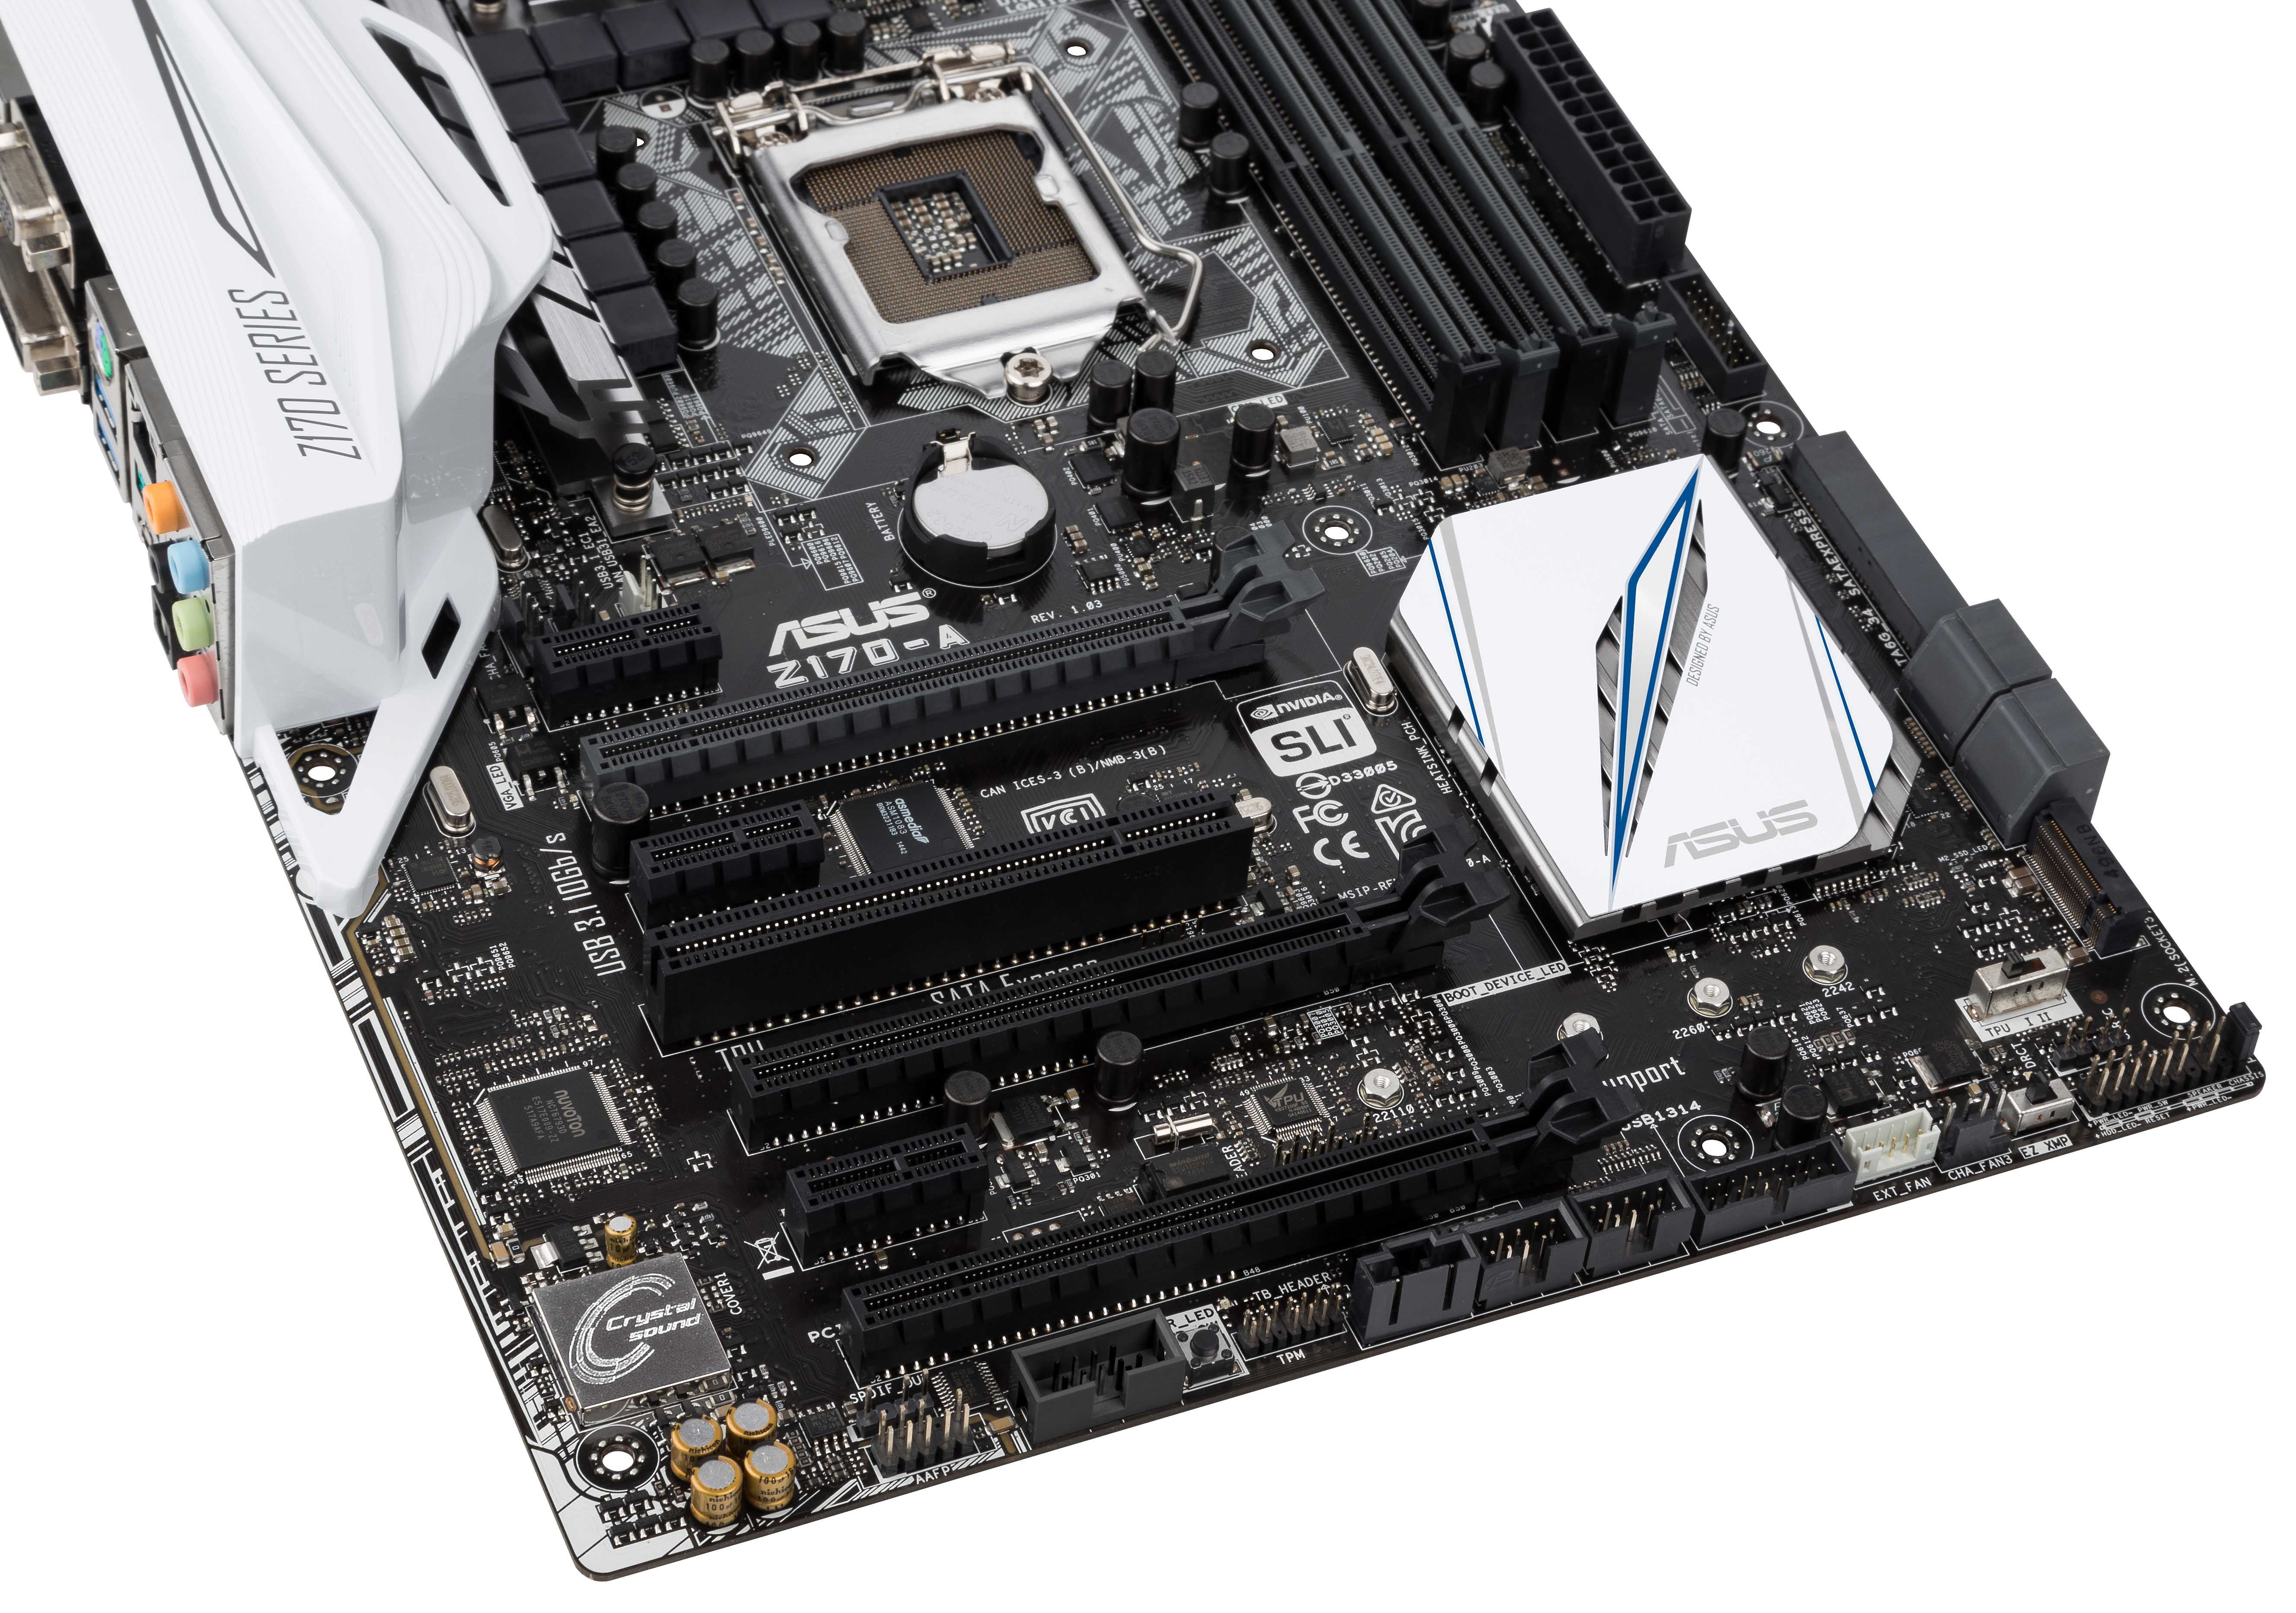
ASUS Z170-A Overview
The motherboard industry has gone through years of consolidation and enhancement, making it very difficult for new companies to emerge. There is strong competition, profit margins are low, and there is a bare minimum expectation of utility. This is seen by the continual march on gaming branded motherboards, if only for SEO, or marketing label enhancements. Aside from ASUS' Republic of Gamers brand, the channel line from ASUS remains free of the gaming SEO and promotes itself as a platform bundled with their self-proclaimed value additions, which can be condensed into 'design, user requested software tools and user experience'. ASUS is not alone in this push, which makes the Z170-A an important part of ASUS' product offering. At $165, it aims at a price point that end-users and system integrators alike will use for the majority of their i5 and i7 systems.
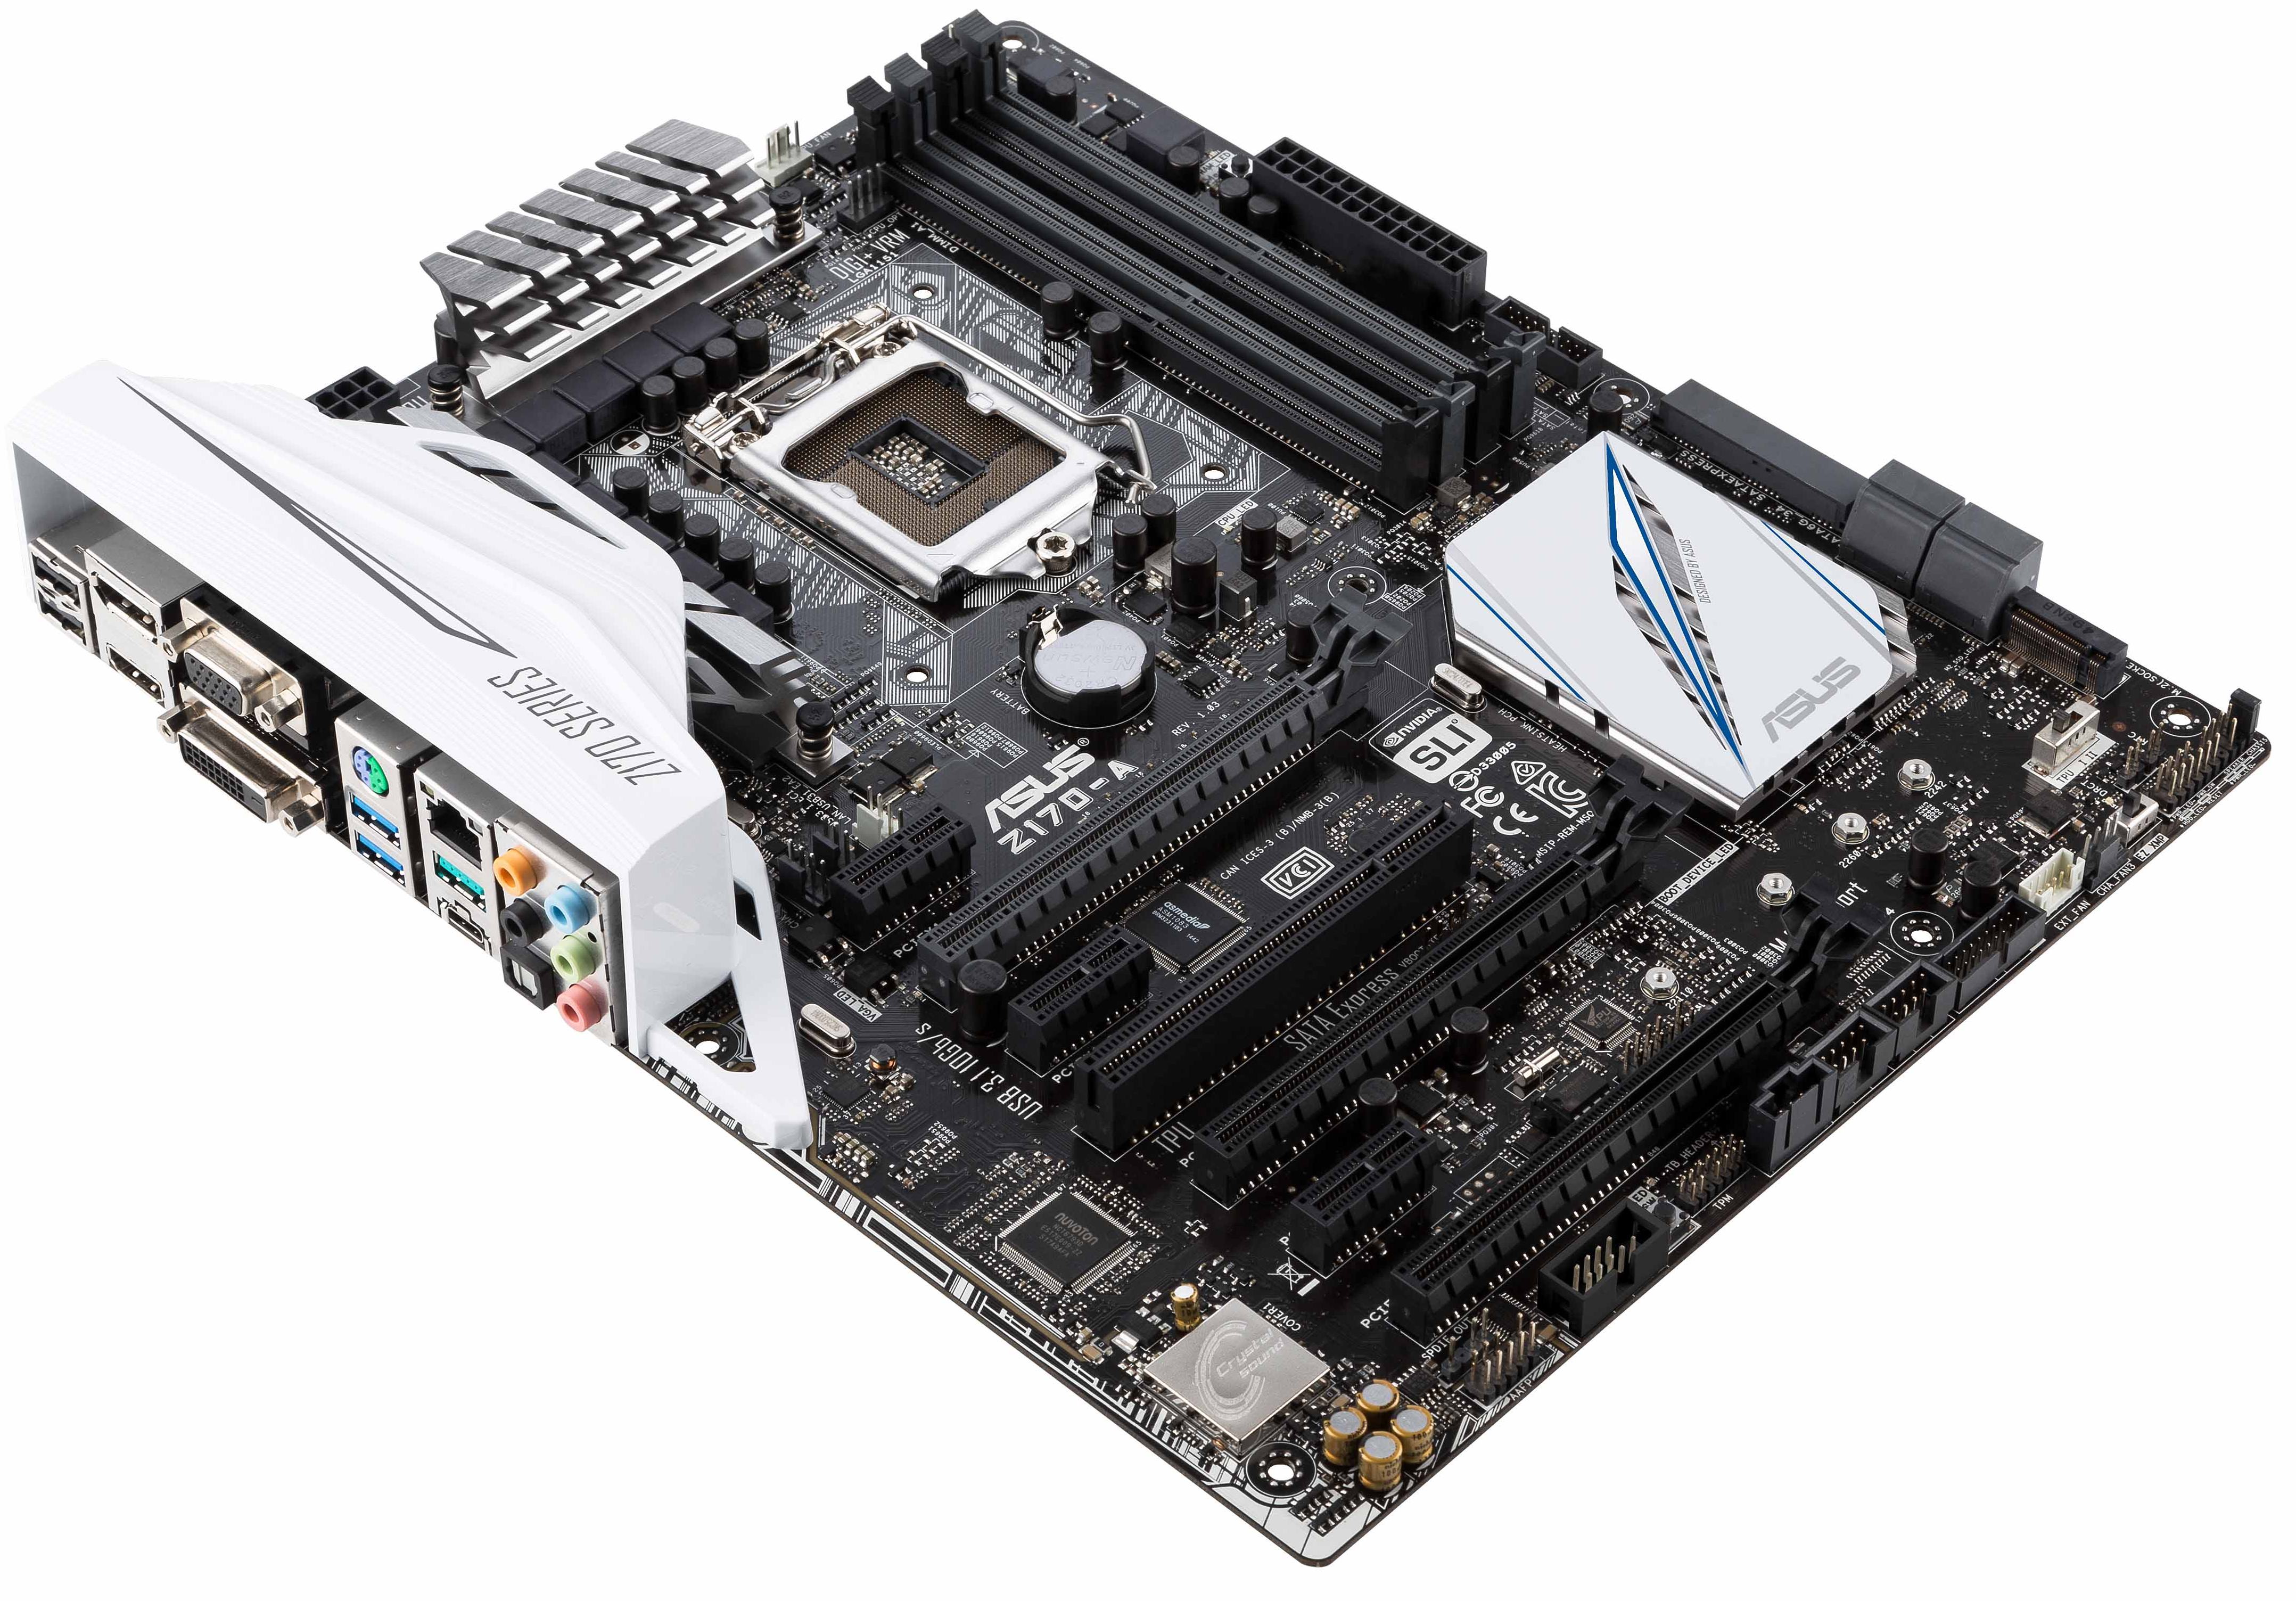
On the face of it, looking at the base hardware add-ons, the Z170-A comes in with a fair amount of what you expect at this price. Networking is the Intel I219-V controller, there is a single PCIe 3.0 x4 based M.2 slot, two USB 3.1 ports at 10 Gbps is provided by an ASMedia ASM1142 controller in both Type-A and Type-C formats, and the PCIe layout promotes two-way graphics with a tertiary PCIe 3.0 x4 slot from the chipset so SLI is not disrupted. One thing to note is the use of a Realtek ALC892 codec, which is perhaps a little surprising as there will be other motherboards around this price point that have the ALC1150.
ASUS' marketed unique points include their onboard ICs to aid overclocking (TPU) and power (EPU), along with an onboard switch to help enable XMP on a memory kit without going into the BIOS. Building on this is a Pro-Clock IC that extends the overclocking range in the base frequency and a T-Topology memory trace design typically reserved for maintaining the high end desktop platform signal integrity (but is optional on Z170). The BIOS and software from ASUS has historically been positive, and we see this as a continuing trend with Skylake.
We worked with the Z170-A for part of our Skylake CPU coverage, as added information and BIOSes from ASUS on elements such as the FCLK issue and PCIe performance. The Z170-A, for the BIOSes tested, did not have multi core turbo but did give a 4.8 GHz overclock both in automatic and manual modes.
The $160-$170 price band will be hotly contested for both self-build and retailer pre-built designs. Here ASUS executes well with plenty of positives. For regular and power users, unless you want two M.2 devices or dual network ports, this board seems ideal for a shortlist.


Quick Links to Other Pages
Page 2: Board Features and Visual Inspection
Page 3: BIOS
Page 4: Software
Page 5: System Performance (Audio, USB, Power, POST Times on Windows 7, Latency)
Page 6: CPU Performance, Short Form (Office Tests and Transcoding)
Page 7: Gaming Performance 2015 (R7 240, GTX 770, GTX 980)
Page 8: Conclusions
Quick Board Feature Comparison
| Motherboard Comparison | ||
| ASUS Z170-A | ||
| Socket | LGA1151 | LGA1151 |
| MSRP at Review | $165 | $230 |
| DRAM | 4 x DDR4 | 4 x DDR4 |
| PCIe Layout | x8/x8 | x8/x8 |
| BIOS Version Tested | 0603 | 142 |
| MCT Enabled Automatically? | No | Yes |
| USB 3.1 (10 Gbps) | ASMedia ASM1142 1 x Type-A 1 x Type-C |
ASMedia ASM1142 1 x Type-A 1 x Type-C |
| M.2 Slots | 1 x PCIe 3.0 x4 | 2 x PCIe 3.0 x4 |
| U.2 Ports | No | No |
| Network Controller | 1 x Intel I219-V | 1 x Killer E2400 |
| Audio Controller | Realtek ALC892 | Realtek ALC1150 |
| HDMI 2.0 | No | No |
ASUS Z170-A Overclocking
Experience with ASUS Z170-A
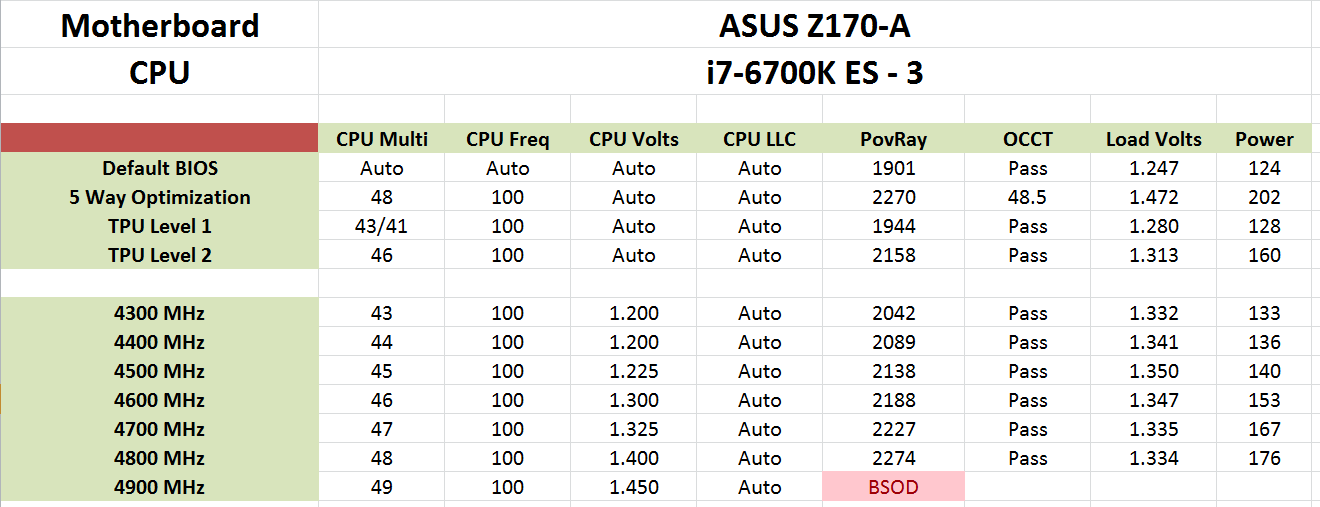
The Z170-A was the second motherboard we tested as part of the initial Skylake routine, partly due to the discussions we had behind some of the discrete PCIe co-processor performance on the Z170 platform. For overclocking, while the previous motherboard we had tested seemed happy moving around at 4.6 GHz for an overclock, the ASUS Z170-A went straight in at 4.8 GHz, no questions asked. It was quite a difference.
Through the Automatic overclock tool, we let it run and set a temperature limit of 90C for the intermediate stress testing, with each stress test lasting two minutes. I came back to the system about 15 minutes later to see the final results screen show the 4.8 GHz value. We validated this speed and it passed all of our tests, except video encoding. (We discussed the principles of stability in our Skylake overclock testing piece and suffice to say, there are two major camps on the issue.) The TPU Switch gave a good set overclocks as well, with the first stage giving 4.3 GHz/4.1 GHz split for +100 MHz (mild), and the second stage going up to 4.6 GHz on a single core turbo.
For manual overclocking, the results were almost the same, although we were able to get the same frequencies at a lower voltage and power which might be expected. We went for 4.9 GHz as well, but this failed regardless of voltage causing POV-Ray to crash and the system to bluescreen.
Methodology
Our standard overclocking methodology is as follows. We select the automatic overclock options and test for stability with POV-Ray and OCCT to simulate high-end workloads. These stability tests aim to catch any immediate causes for memory or CPU errors.
For manual overclocks, based on the information gathered from previous testing, starts off at a nominal voltage and CPU multiplier, and the multiplier is increased until the stability tests are failed. The CPU voltage is increased gradually until the stability tests are passed, and the process repeated until the motherboard reduces the multiplier automatically (due to safety protocol) or the CPU temperature reaches a stupidly high level (100ºC+). Our test bed is not in a case, which should push overclocks higher with fresher (cooler) air.
Overclock Results


29 Comments
View All Comments
Le Geek - Wednesday, October 21, 2015 - link
I believe you meant "front" USB 3.1 panel instead of "font" in the conclusion.AlexIsAlex - Thursday, October 22, 2015 - link
"Non UEFI POST Time": Could you clarify this a bit - do you mean if not booting using UEFI? If so, then why not? These days, I would have thought UEFI booting would be the more common case.The major delay I'm seeing booting with this board is between power-on and first text-on-screen. Not sure exactly what it's doing there, but it's a good few seconds of black before getting the info screen (or graphical logo, depending on configuration)
Arbie - Sunday, October 25, 2015 - link
It's amazing what a high-tech assembly of high-tech parts we can buy for $165.Anyway - please don't forget to credit Asus for their attention to fan control. I haven't checked the competition this time around but in the past Asus has been way, way ahead. This is one mobo function that reviewers *constantly* overlook and thereby undervalue, since they aren't building in a box. So Asus, who goes the extra mile and beyond, is rarely credited for doing so.
ymmv__ - Monday, October 26, 2015 - link
I wish Anand Tech would use an editor to streamline Ian Cuttress' convoluted, badly written texts. This stuff is nigh unreadable.gw74 - Tuesday, October 27, 2015 - link
Sabertooth Z170 Mark 1 thoablevy - Tuesday, October 27, 2015 - link
Just finished a build with this board. For storage I used a Samsung 850 EVO SSD.for the operating system and a WD 1T hard drive. I loaded Wind 7 back on and updated to Win 10 with no problem. Loaded most of my wifes software and then it crashed. It crashed so hard I couldn't get to the BIOS! I finally found that by unplugging the SSD I could get into the BIOS. I turned the machine off and booted Into the BIOS. I noticed that the SSD was listed on the sata ports but not in the boot list. However if I went to the boot menu, the samsung drive was listed and I could boot to it. I tried a number of fixes including resetting the CMOS, updating the BIOS, reinstalling WIn 10, moving the SSD to another SATA port. No joy. Finally I spent some time on Google and found that others have run into this on previous ASUS MBs. I finally found that one of the people found that if you powered off and disconnected the power for 10-15 minutes the computer boots to the SSD. I have rebooted 3-4 times now with no problem. It's worth noting that the Samsung still doesn't show up in the boot list. Note also that I had a chat with a tech from Asus and while he made some suggestions about what to try, he was not aware of this fix. Maybe this post will get Asus to look into this issue and fix their bios.ghanz - Saturday, October 31, 2015 - link
Try enabling Sata hot plug in the bios.And when you manage to boot into windows, disable Intel RST link power management.
Some SSDs have compatibility issues on certain platforms & configurations if power saving options are enabled.
ablevy - Monday, November 2, 2015 - link
After loading a new bios, the SSD showed up on the advanced page as one of the drives in the boot list and I could move it to the top. Since then no problems with booting from the SSD.Thanks
ablevy - Saturday, November 7, 2015 - link
I spent some time exploring overclocking and found that the latest UEFI is buggy. For example trying to return to default fails under all conditions I have tried, including shorting the CMOS as Asus recommends or removing the battery. Exiting from the UEFI sets Autotune on even when you exit from the "default" and you end up in the "optimized default". A second issue I had with this board is "black screens" when the system is idle which don't respond to the keyboard or mouse. I finally noticed that the keyboard was actually off and realized tha the power option to selectively turn off the USB ports was selected. Turning off this option solved part of the "Black Screen" problem. However I still suffered from occaisonal "black screens". I have now turned off all power options and for about the last 24 hours of constant operation haven't had any "black screens". My recommendation for anyone building this system is to install Win 7 and wait a few months before installing Win 10. In my opinion the UEFI is not ready for prime time.ablevy - Wednesday, November 18, 2015 - link
I have continued to work with the machine and the "black screen" issue has not reappeared. However a new stability problem has appeared. Under some circumstances the USB ports fail to recognize the Apple iPhone. I have not isolated why, but the resulting symptoms are very reproducible. First plugging the iphone into the computer does not result in a connection to the iphone. Second turning the computer off results in the screen and apparently Windows shutting down, but the power light doesn't shut off. There also seems to be intermittent disk action given that the disk light blinks. After a few minutes I shut the computer down by holding the power down. Restarting the computer leads to a long boot time before the Windows logo comes up, but Win 10 boots normally. However the iphone will not connect either through a USB 3.0 port or a 2.0 port. Windows will also not see a memory stick in either port. Turning the machine off results in the same behavior. Power light remains on, until held down for 8-10 seconds. If however you turn the power off at the power supply and leave it off for somewhere between 5 (less than 5 min won't work)) and 15 minutes then turn the power supply back on and reboot the computer will boot normally (relatively short boot time) and again recognizes the iphone. This behavior of requiring a power off is reminiscent of the original boot problem I had in which I had to turn off the power supply for the computer to see my SSD and boot from it. My best guess is that in addition to the problem Asus has with the USB ports that cause this issue there is a problem with the shutdown cycle and things are being saved that shouldn't be.Note that I'm currently using BIOS 1302 and that the previous BIOS version also exhibited the same issue.
This is a copy of the email I sent Asus today. I am still having difficulty recommending this mb based on the bios issues.