Sony DSC-M1: Good Video, Disappointing Pictures
by Stephen Caston on June 20, 2005 12:05 AM EST- Posted in
- Digital Camera
Playback Features
To switch to Playback mode from Record mode, simply press the Mode button. You can use the left/right arrow buttons to scroll through previously taken pictures and videos. The up/down arrow buttons can be used to adjust the volume of the speaker.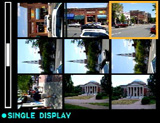 Image thumbnail view (3x3) |
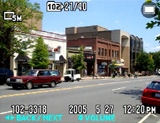 Image regular view |
 Image magnified 5.0x |
To view images as thumbnails, simply slide the zoom controller up. The first thumbnail screen displays 9 images at once; however, by pressing up on the zoom controller again, a 4x4 thumbnail screen will display 16 images at once. By sliding the zoom controller down, an image can be magnified up to 5.0x. While an image is magnified, you can scroll to different areas of the image by using the arrow keys. To jump back out to a full screen image, press the Set button (in the center of the 4-way control pad). While viewing a single image, it can be erased by pressing the Image Size/Delete button. If you are in a thumbnail display, you will have the option to delete everything in the folder or to select specific images to delete. To play back a video clip, the Set button must be pressed. While a video clip is playing, you can rewind or fast-forward with the left/right arrow keys. As we mentioned earlier in the review, there are navigation buttons to the left of the LCD monitor that can also be used to review images and play video clips.
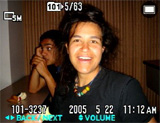 Normal |
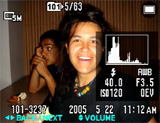 Detailed w/histogram |
 No info. |
The playback display can be selected from one of 4 options: Normal, Detailed w/histogram, no information, and backlight off. The normal display will have the battery life remaining (minutes), image resolution, folder, image number out of total images in folder, file number and date/time. On the display with the histogram, the following information is also added: exposure compensation, ISO, flash, white balance, shutter speed, and aperture.
By pressing the Menu button, there are a number of additional options at your disposal. Below is a table outlining these options.
| Playback Menu | |
| Folder | Select |
| Protect | Tag |
| DPOF | Tag |
| All in this folder, DPOF image, Select, This image, Cancel | |
| Slide | Interval (3, 5, 10, 30 sec., 1 min), Image (Folder, All), Repeat (On, Off), Start, Cancel |
| Resize | 5M, 3M, 1M, VGA, Cancel |
| Rotate | Rotate, Ok, Cancel |
| Setup | Enter |
The Folder option allows you to specify the folder which contains the images/videos that you want to view. The Protect option allows you tag specific files so that they cannot be deleted accidentally. Protected files can, however, be erased if the memory stick is formatted. DPOF (Digital Print Order Format) allows you to specify images that you wish to print and the Print option allows you to print images on a PictBridge-compatible printer. The Resize option will allow you to upsize and downsize images to one of the higher/lower resolutions. With the Rotate option, you can rotate images full circle, 90 degrees at a time. The Setup option will bring up the same setup screens that we discussed at the end of the Recording Features page.


21 Comments
View All Comments
Nancymbsmo - Tuesday, January 17, 2012 - link
So far, Sony Cybershot has ruled in the camera market, but now as per the advent of new technologies and rising challenges, many people have shifted from Cybershot to other coolest digital cameras. But <a href="http://www.techiecop.com/cameras/sony-cameras/sony... Cybershot </a> DSC-M1 got Unique style and beautiful design along with powerful performance.